
Social Media Marketing

What does it take to make a good business presentation? You must have a creative presentation idea, a well-structured plot, engaging points, attention-grabbing scenes, and a purpose.
When preparing, think about your audience’s interests and how to intrigue them. Use tools like Renderforest with creative scenes, colors, icons, text, voiceovers, and music to enhance your online presentation.
You’ll need helpful and easy-to-use tools to win your audience over on your way to making a successful business presentation online. Creative scenes, colors, icons, text, voiceovers, and music tracks will take you closer to your goal.
Renderforest is a platform to help you create your dream presentation online using these tools. You can complement your video presentations with unique scenes, characters, and other features with a list of customizable templates. Check it out for yourself!
If you want to make a presentation video with Renderforest but don’t know where to start, here’s a step-by-step tutorial.
Let’s jump right away!
You’ll first need to be signed in to your Renderforest account. If you don’t have an account yet, sign up for free. Then, go to the “Create video” section on the menu and choose the “Presentations” sub-section.
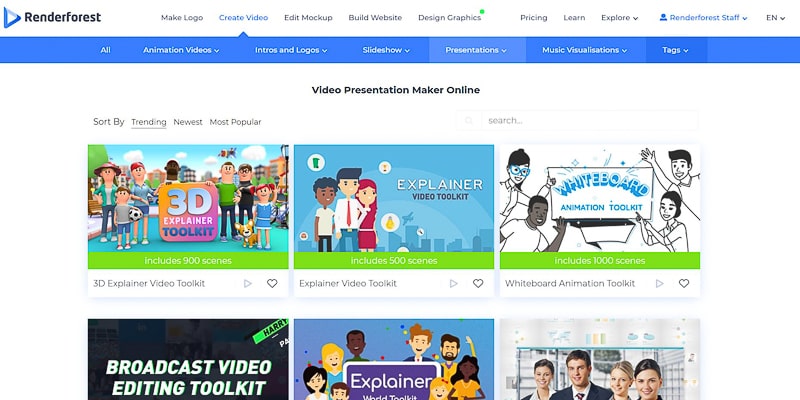
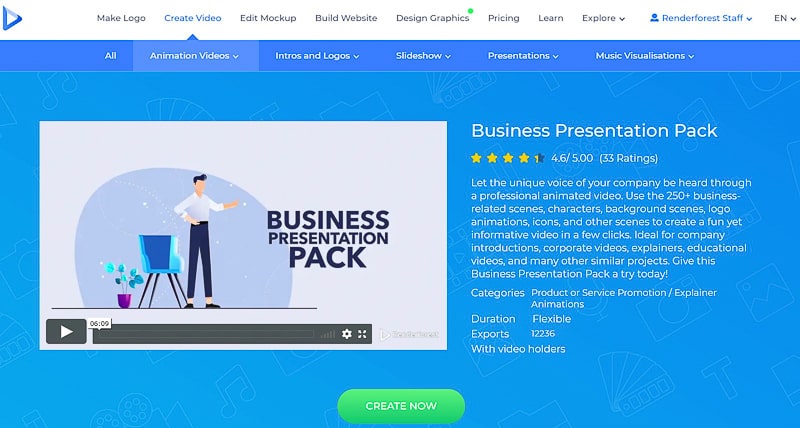
Here, you will find many video templates to choose from. Select a business presentation template you like and click the “Create now” button. We’ll use the “Business presentation pack” for this tutorial, which has more than 225 scenes.
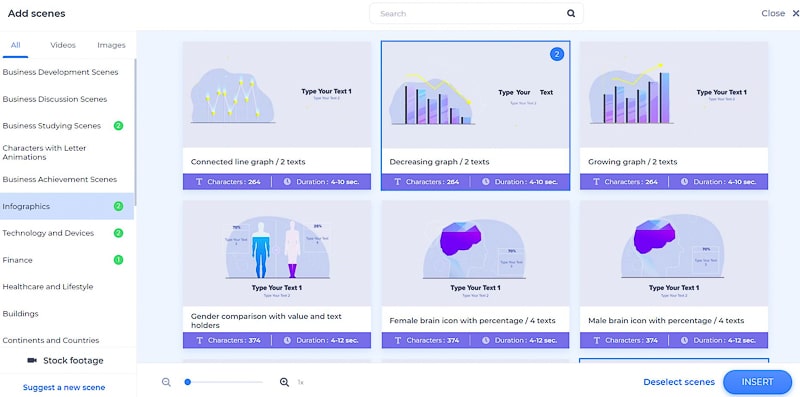
Once you click “Create” on the next window, you’ll be transferred to a new window, where you can select the scenes you want to include in your business presentation.
The scenes here are categorized to help you navigate and choose what you want easily. In the “Business studying scenes,” you will find creative scenes with characters in the studying process.

Colorful “Infographics” can make your presentation more professional, so check them out too.
In the “Technology and Devices” collection, you will find scenes with icons such as location, Wi-Fi, idea lamps, and more to give your video lively tones.

“Finance” scenes will help you tell your audience about your payment options and service or product prices.

With scenes in the “Business development” category, you can tell your backstory or your business.
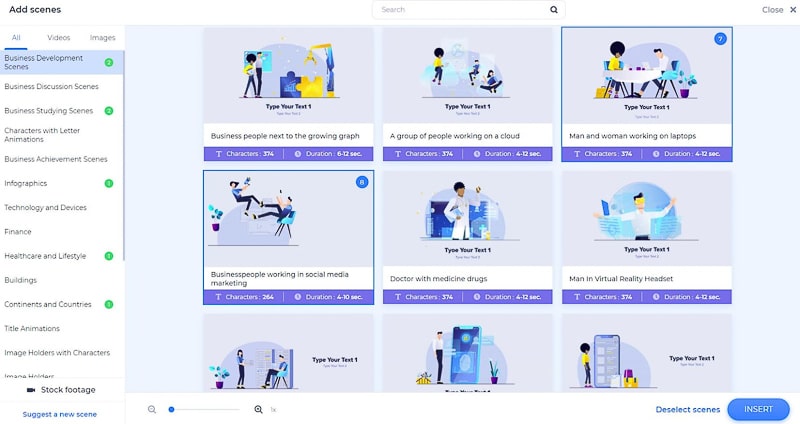
Image and video holder scenes are also available to use while making your video. They will make your presentation more real and personal.
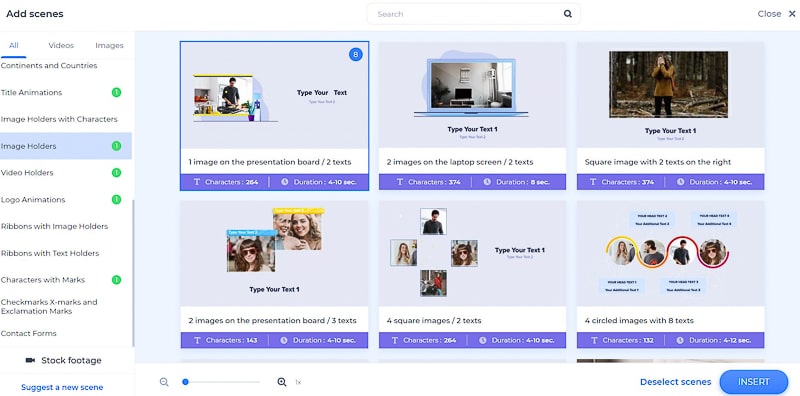
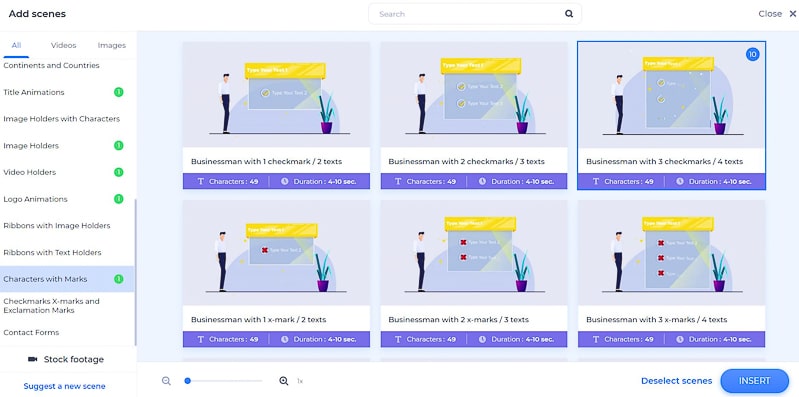
Also, add lists with checkmarks and x-marks to your videos, either with characters or without them.
Another category you might like to choose a scene from is the “Logo animations.” This will help your logo appear at the end or the beginning of your presentation.

There are more scene categories for you to choose from, such as “Healthcare and lifestyle,” “Buildings,” “Continents and countries,” etc. Explore the list to find more scenes suitable for your presentation.
Once you select all the scenes you need, click “Insert” to confirm them and move to your dashboard, where you can start editing.
The scenes here are flexible and easy to work with. Move the scenes by dragging them in the timeline, delete them by clicking on the trash box icon, and add new scenes by clicking the plus icon next to your scenes. You can also duplicate and replace the scenes by clicking on the three-dot menu on every one of them.
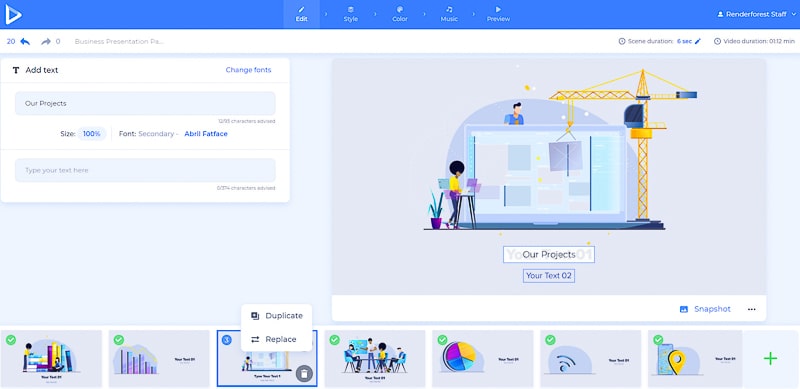
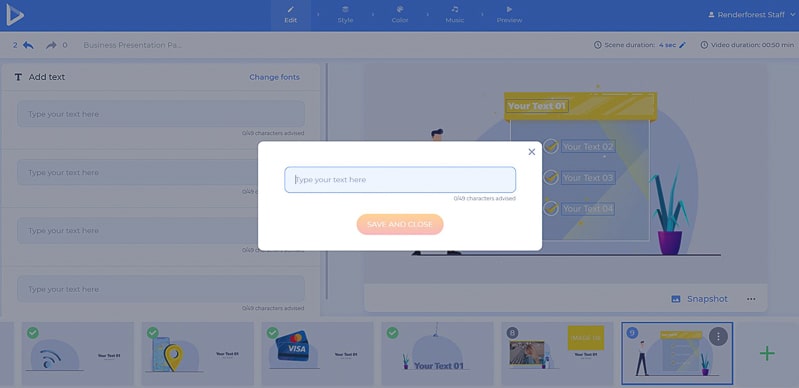
To start adding your presentation text to the scenes, click on the text fields you want to edit and paste or type in your text.
If you want to add video or image files to your presentation, click on their respective fields and choose one of the options. Click “Upload” to add it from your device and “Media Library” if you want to add it to your previous uploads. To add a video or photo from the web, select “Video URL” or “Image URL,” respectively, and paste the links.
The “Stock footage” and the “Stock image” option, depending on the scene type, will offer you a variety of media from our collection. If you want to change the video or image file, click on it, press “Remove,” and upload a new one.

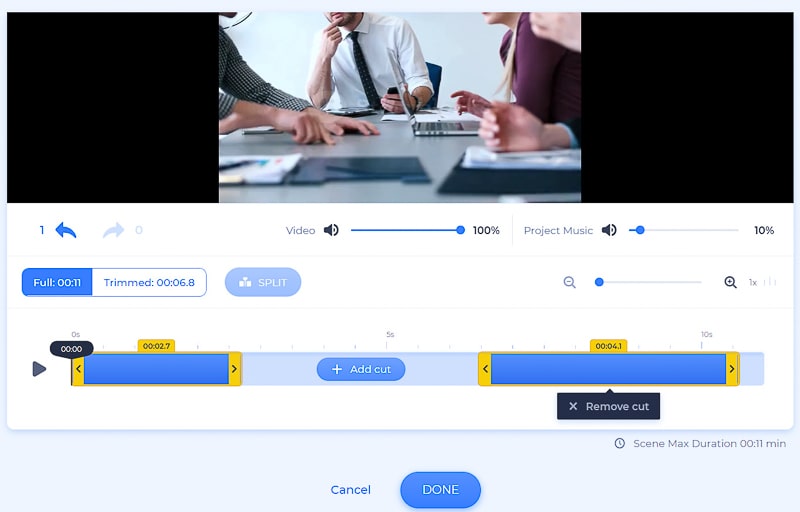
Right after you add your video with any of these options and click “Insert,” you can trim the video to take the exact parts you want. Click on the “Add cut” button to cut more parts from your video and “Remove cut” if you change your mind. Adjust the sound of the uploaded video, if needed, before clicking “Done.”
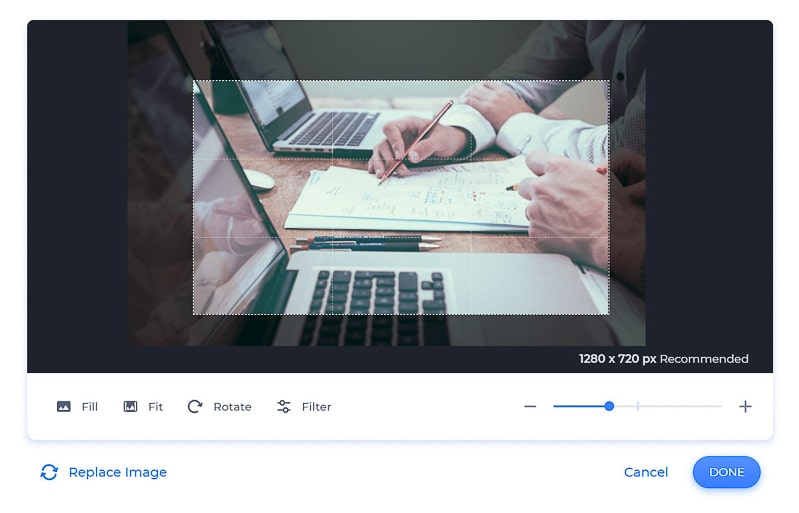
Crop, flip, rotate, and apply filters to your image files to make them look more professional in your presentation.
Add your logo in the corresponding scenes by clicking on the logo holders. If you don’t have one yet, create it on the spot by clicking on the “Create logo” option.

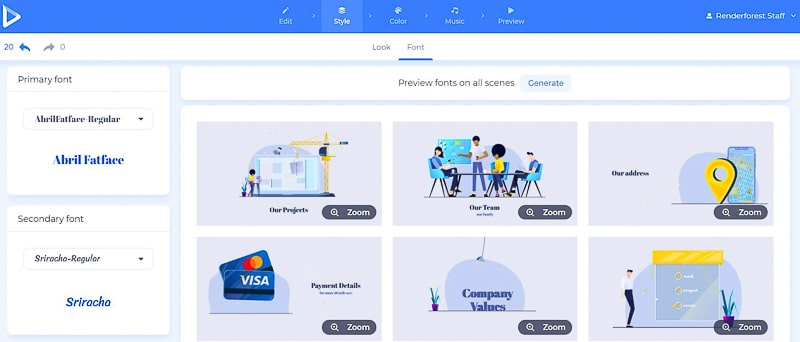
In the “Style” section, you can change the overall look of your business video and font. Select a font for your text and click the “Generate” button to see the changes made to your scenes before saving them.
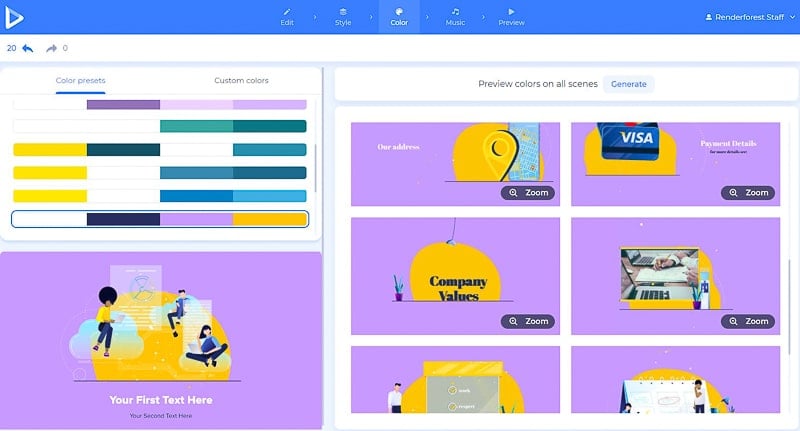
Also, change the colors of your business presentation video by going to the “Color” section. Pick a color combination and click “Generate” to see the colors come alive on your video.
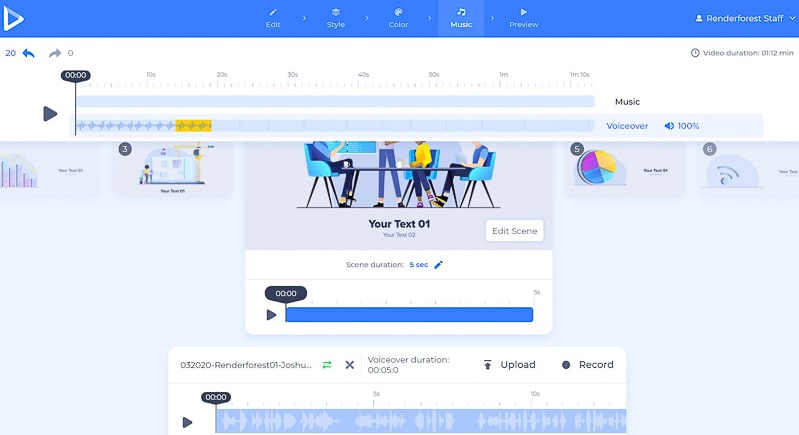
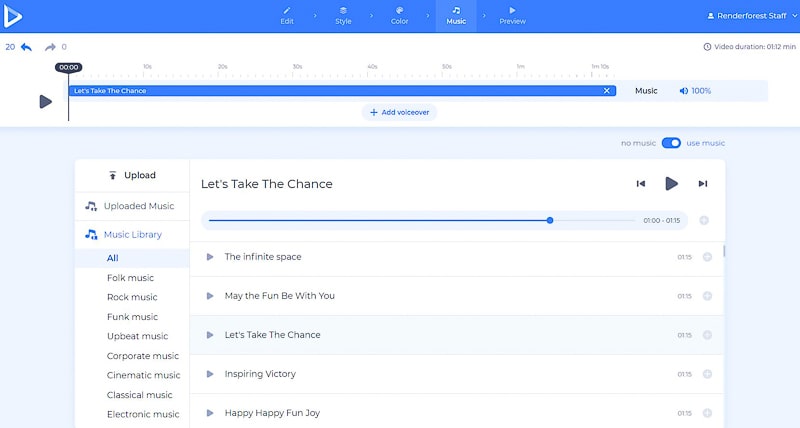
Go to the “Music” section to add a music track or voiceover to your business presentation. Click on the “Add voiceover” button to upload or record one to tell more about the presentation and the scenes.
Cut, lower the volume, replace, or mute the voiceover by clicking on the appropriate options. Note that each scene can have a different voiceover, so it’s possible to leave some scenes without a voiceover or record and upload your recordings for each scene separately.
Add a background music track to your presentation by selecting one from our library, uploading from your device, or picking one of your previous uploads.
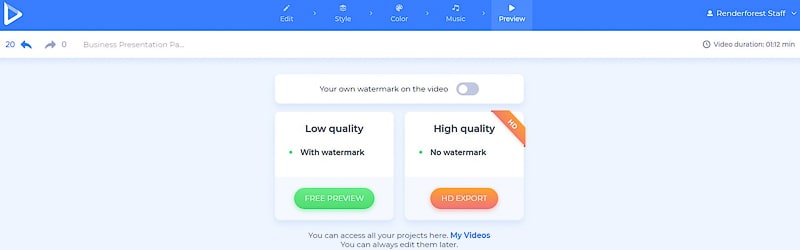
After all the necessary changes are made, “Preview” your work before downloading it.
There are two options for you to download your video. The first is the free option, which offers SD360 quality videos with the Renderforest watermark. You can edit, download, and publish your videos whenever you want.
With the “HD export” option, you can download your video in high quality and without a watermark. Find all the details about our pricing here.
Your pretty and informative business presentation is now ready for you to share with your audience. It will attract hearts and minds, so be prepared for good feedback.
If you are looking for more templates to create presentations with, here are several packs you might like:
Give your presentations a modern and abstract touch with this template to deliver your message more picturesquely. Perfect for business and HR presentations, timetables, and more.
Create professional-looking and unusual presentations to attract the attention of your audience. Perfect for business, corporate presentations, promotional videos, ads, and more.
Create powerful videos for your stories and promotions to impress your followers. Over 100 business scenes are ready to help you make the perfect video to support your business.
Tell your business story, upcoming news, or any other kind of information to your staff and followers with class and glam. No more boring presentations to fall asleep to.
Creating a compelling business presentation involves having a creative idea, a well-structured plot, engaging points, attention-grabbing scenes, and a clear purpose. Consider your audience’s interests and use tools like Renderforest for online success.
Renderforest offers customizable templates for video presentations. Follow these steps: sign in, choose a template, select scenes, and edit on the flexible dashboard. Add text, images, or videos, trim and customize media, and adjust style elements.
Change fonts and colors, add music or voiceovers, and preview your work before downloading. Renderforest provides free downloads with a watermark or HD exports without. Share your professional presentation and explore more templates like Modern Business, Futuristic Cube, Business Character Promotion, and Modern Corporate.
In conclusion, with Renderforest, making compelling business presentations is easy and impactful.

Share this
Article by
Dive into our Forestblog of exclusive interviews, handy tutorials and interesting articles published every week!
Read all posts by Renderforest StaffCreate Professional
in Minutes without Technical Skills.
 Sign Up Now. It’s Free!


Create Professional
in Minutes without Technical Skills.
Sign Up Now. It’s Free!
