
Social Media Marketing

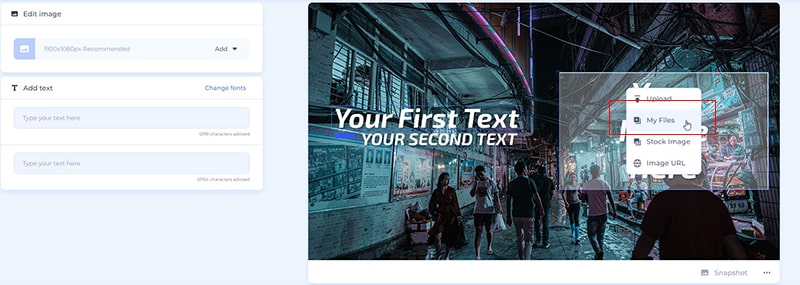
Do you know how to add your images and videos to your project?
We’ve updated our “My Files” section to help you organize your media files and find what you need in a snap.
Let’s start from the beginning and see where to find your media files and how to use it.
There are 2 ways to find your files:
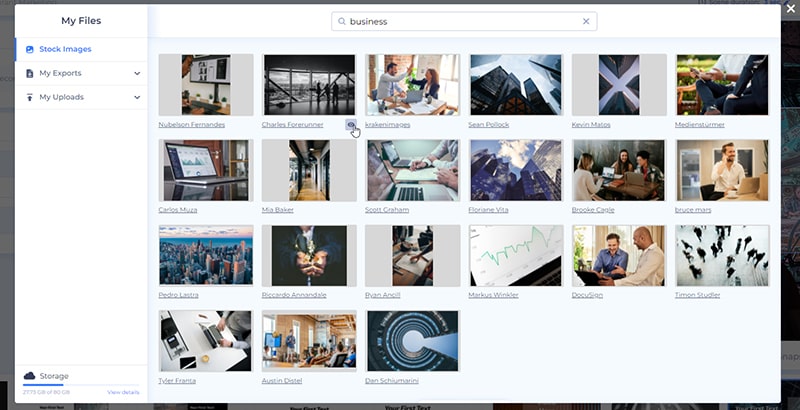
Our new “My Files” section gives you an opportunity to create your folders and organize your files however you want. There are several default folders: My Exports, Sounds, Fonts, Recent Uploads, and Default Folder. The “Default Folder” contains all your file uploads.
Create your folders by clicking on the “New folder” button. Add your photos and videos to the folder of your choice and easily find them by sorting your files alphabetically or chronologically.

In the “Sounds” folder, you can find all your music uploads and voiceovers. Here you can upload new files, or record new tracks for your projects.

Based on your subscription plan, you can upload up to 10 fonts. Manage all your fonts from the “Fonts” folder.

The default “My Export” folder contains all your high-quality video exports, graphics, mockups, and logos. You can use them in any of your projects without downloading them to your device.

Depending on the scene you’re editing, in your media library, you can find stock images or videos. Type your keyword to find the relevant matches and click “Insert” to confirm.
For Agency plan subscribers, there’s also a watermark feature for making branded videos. To add your watermark, turn on the “Your own watermark on the video” feature in the “Preview” section, and then click “Add”. It’ll give you several options to add your watermark.
By clicking on the “Add from My Files” option, you’ll be redirected to the media library and can choose the logo or image as your watermark.

Depending on your plan, you will get from 500 MB up to 80 GB storage. If your storage is full, you can either delete the unnecessary files or upgrade your current plan.
You can preview your storage and see the file sizes in order to clean your files and free up some space. Access it by clicking on your name on the top right corner and from the dropdown menu choose “My account”.

Ready to explore all the new features our updated “My Files” section offers? Click the button below to sign in and start creating your amazing projects!
New updates are coming soon. Stay tuned!
Share this
Article by
Dive into our Forestblog of exclusive interviews, handy tutorials and interesting articles published every week!
Read all posts by Renderforest Staff

