
Holidays

Do you know how to turn your basic scientific research presentation into an engaging one?
Of course, you first need to follow the basics: knowing your audience, providing the context and the purpose of your research, describing the problem, highlighting your activities and important information, and adding your conclusion with the key points.
Additionally, relatable media files, scenes, and other features will add more value to your presentation and help you keep your audience concentrated.
To demonstrate how easy it is to visualize your scientific research through video, we’ve prepared a short video about climate change with the help of our video maker. Let’s watch the final result of our work, before learning how to start your own project on Renderforest.
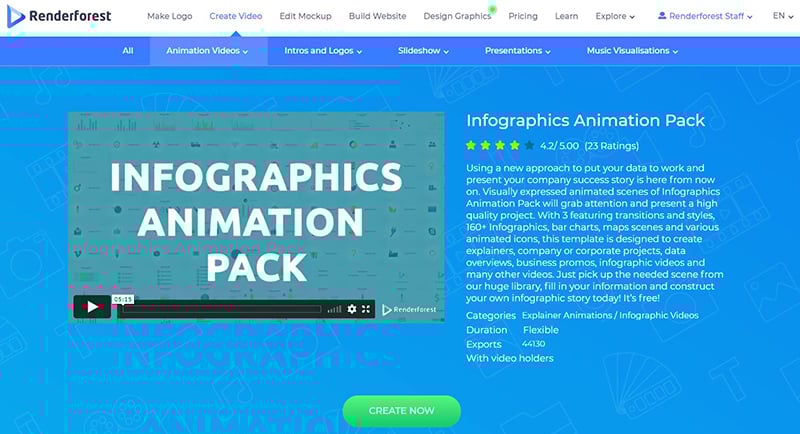
This video was created with one of our presentation templates, “Infographics Animation Pack”. You can create a video with this template after signing up or signing in to Renderforest. Next, go to the “Create video” section on top of the page, then “Presentations”, and “Infographic videos” category. Once you find the template, click “Create now” to start making your video project.
There are two ways for you to create a video: add the scenes manually or load a ready preset, full of relatable scenes for you to edit.
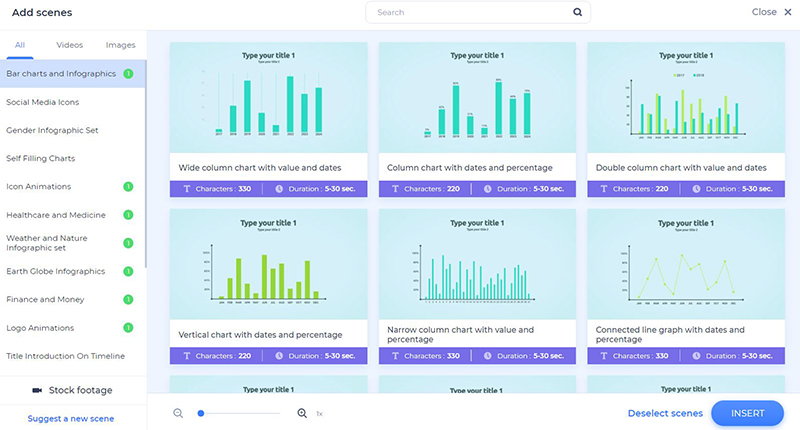
Because we already have a script, we are going to choose the “Add scene” option, to choose the necessary scenes and edit them.

There are many scene categories, including bar charts and infographics, self-filling charts, icon animations, image and video holders, checkmarks, and logo animations. After selecting the scenes you need, click “Insert” to start editing them.
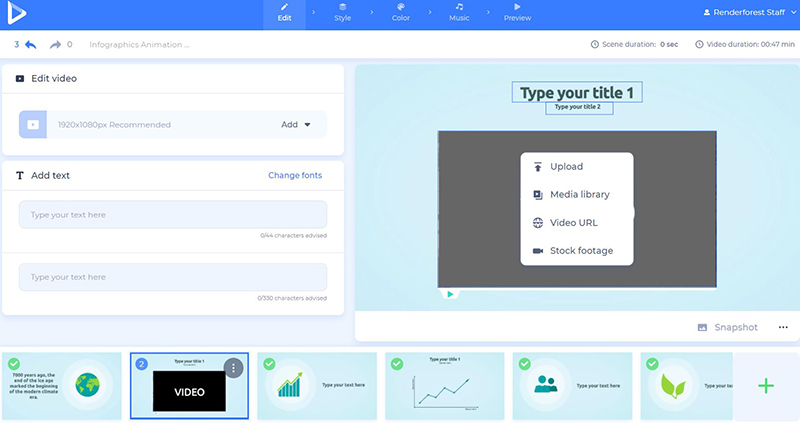
Now, it’s time to customize the scenes. Add your text by clicking on their respective fields. Change the position of the icon and your text as well, to be either on the left or on the right side of your video. Change the size of the text as well, by clicking on the “100%” option under the text field.

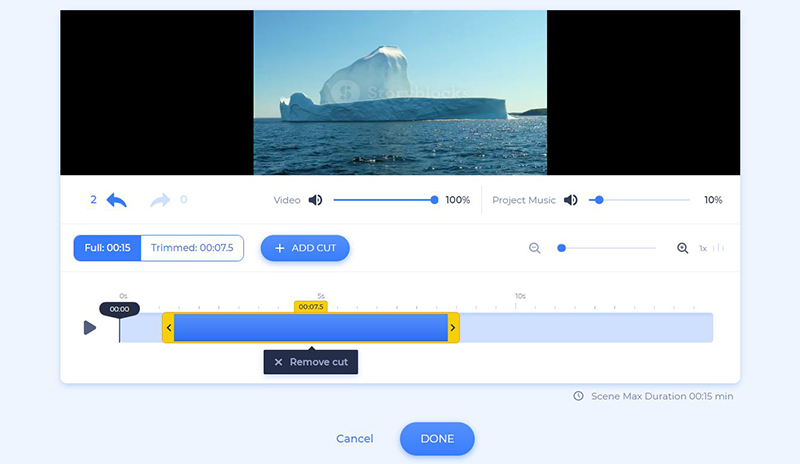
In the next scene, we have a video to add. There are 4 ways for you to do it: via video URL, directly from your device, from the “Media library”, and from our “Stock footage”.
We’ve picked a video from our “Stock footage” library with more than 195.000 stock videos. Type your topic or a keyword in the “Search” field and after choosing a video, click “Insert” to confirm it.

Trim or change the volume of your added videos, to make them suitable for your project.
In our project, we also have a chart. There are many different types of charts, so you have the chance to pick the most suitable ones for your data.

If you have a list of items, you can present them with checkmarks or x-marks. Simply choose the scene and fill in the info.

As an ending scene, you can add your logo animation. You have 3 options for adding an image to your project: via image URL, from your “Media library”, or your device. If you don’t have a logo yet, create one on the spot, before adding it to your project.
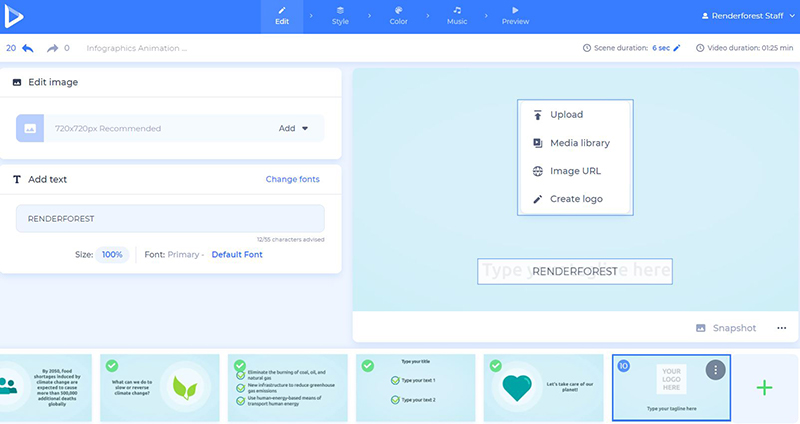
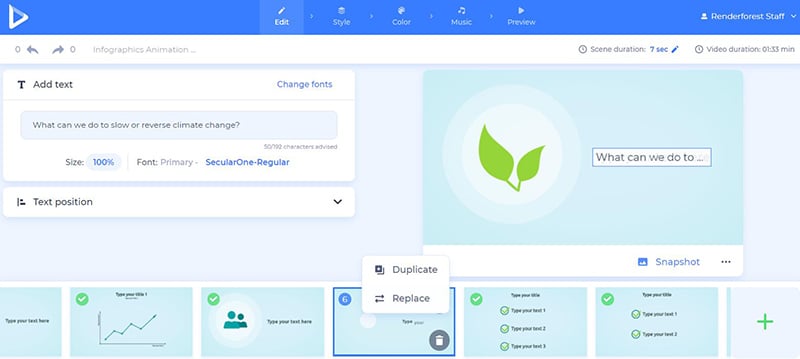
If you don’t like the placement of your scenes, feel free to change their position, duplicate, replace or delete them. Adding additional scenes to your project is also possible at any point in your working process.
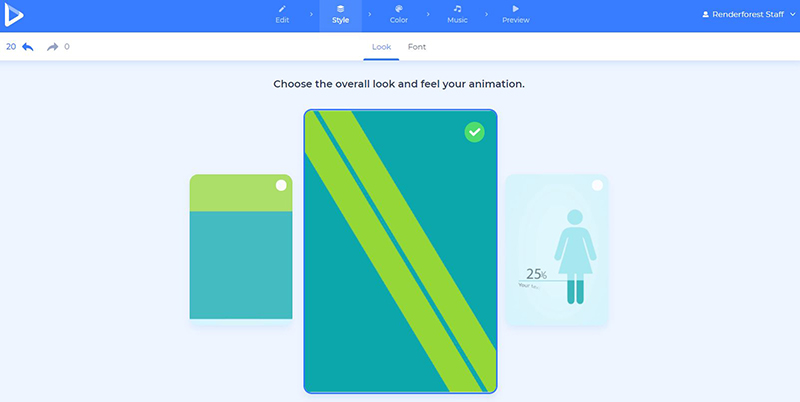
Once you finish editing the scenes of your video, go to the “Style” section and pick one of the suggested transitions.
Select the text fonts of your video next, and click “Generate” to see the changes applied to your scenes.

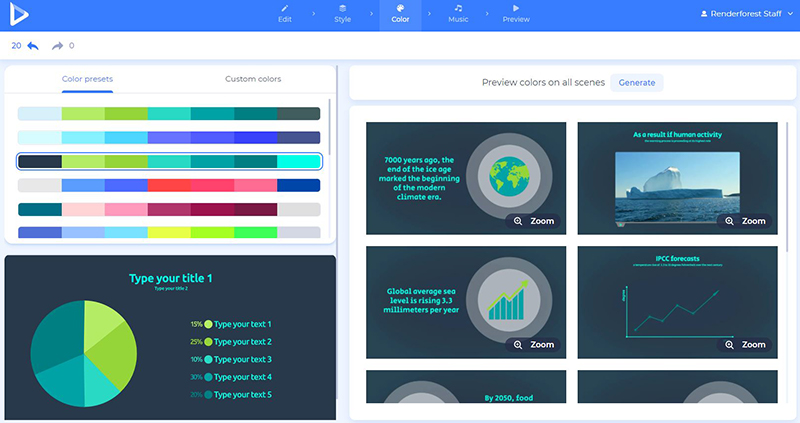
In the “Color” section, pick one of the suggested color palettes or add your custom colors, to change the mood of your video. The “Generate” button will help you see the changes, before saving it.
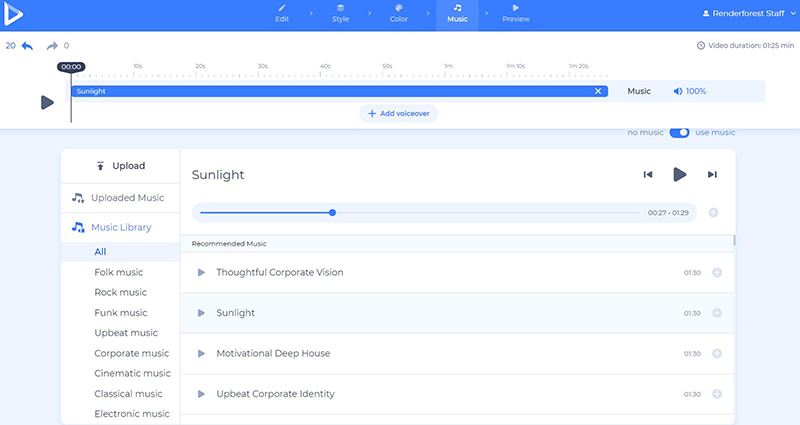
In the “Music” section, choose a track from our library, “Upload” music from your device, pick one from your previous uploads, or leave it without a sound.
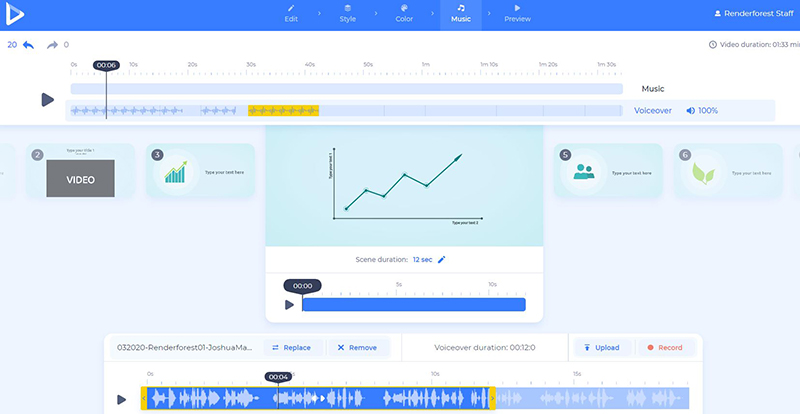
Add a voiceover to your video as well, to explain your data better. Upload it from your device, or record it on the spot. There are easy ways for you to cut it, lower the sound of the recording, replace it, or mute it completely.
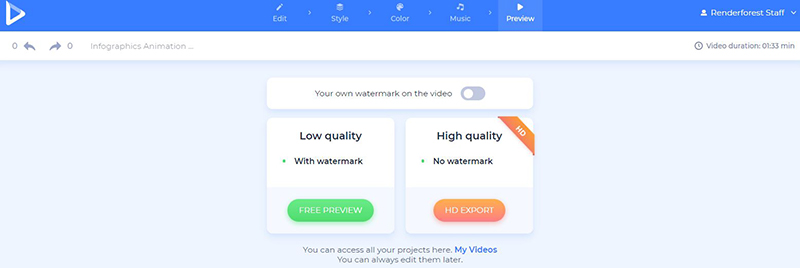
Once your video is ready, preview it to see the final result before downloading it.
There are two ways for you to export your video. The first one is the free option, offering SD360 quality videos with the Renderforest watermark. You will be able to edit, download, and publish your videos any time you want by going to the “My videos” page of your account. The other, “HD export” option, offers you to choose one of our paid subscriptions, and download your video with high-quality and no watermark. The details of our pricing can be found here.
Make your scientific research video stand out and impress your audience with a dynamic presentation of data and numbers. Are you ready to try it now? Let’s go!
Be a step ahead in the market by introducing your data to your followers with modern infographics. Over 500 animated icons, bar charts, map scenes, and more, are waiting to renew your infographic expectations. Perfect for business presentations, explainer videos, and more.
Promote your scientific YouTube channel, or create a smart-looking intro for your project with this cosmic preset. It will help you increase the number of your audience and make them look forward to your next presentation.
Promote your company or small business with the help of over 80 scenes, diagrams, charts, and more. Suitable for company introductions, presentations, and other projects.
Share this
Article by
Dive into our Forestblog of exclusive interviews, handy tutorials and interesting articles published every week!
Read all posts by Renderforest StaffCreate Professional
in Minutes without Technical Skills.
 Sign Up Now. It’s Free!


Create Professional
in Minutes without Technical Skills.
Sign Up Now. It’s Free!
