


AI
A strong blog post should not live in only one format.
If you have already written a useful article, you have the raw material for a video: a topic, a structure, a point of view, examples, explanations, and a reason for the audience to care. The hard part is not starting from zero. The hard part is turning that written structure into a video people will actually watch.
That is where AI can help.
AI video tools can take a blog post, summarize the main ideas, turn sections into scenes, generate a first video draft, add visuals, create voiceover, include captions, and help you export the finished piece for different platforms. But the best results still need human judgment. A good blog-to-video workflow is not “paste the article and publish whatever comes out.” It is choosing the right article, shaping it into a clear script, generating a draft, then polishing it so the video feels intentional and on-brand.
This guide walks through how to convert a blog post into a video with AI, what to keep from the original article, what to cut, how to use Renderforest for the workflow, and how to publish the finished video across your blog, YouTube, LinkedIn, Reels, TikTok, email, and landing pages.
To convert a blog post into a video with AI, start by choosing a blog post with a clear topic, strong takeaways, and visual potential. Then shorten the article into a video script, turn the sections into scenes, generate a first draft with an AI video tool, edit the visuals and narration, add branding, review captions and voiceover, and export the video for the right platform.
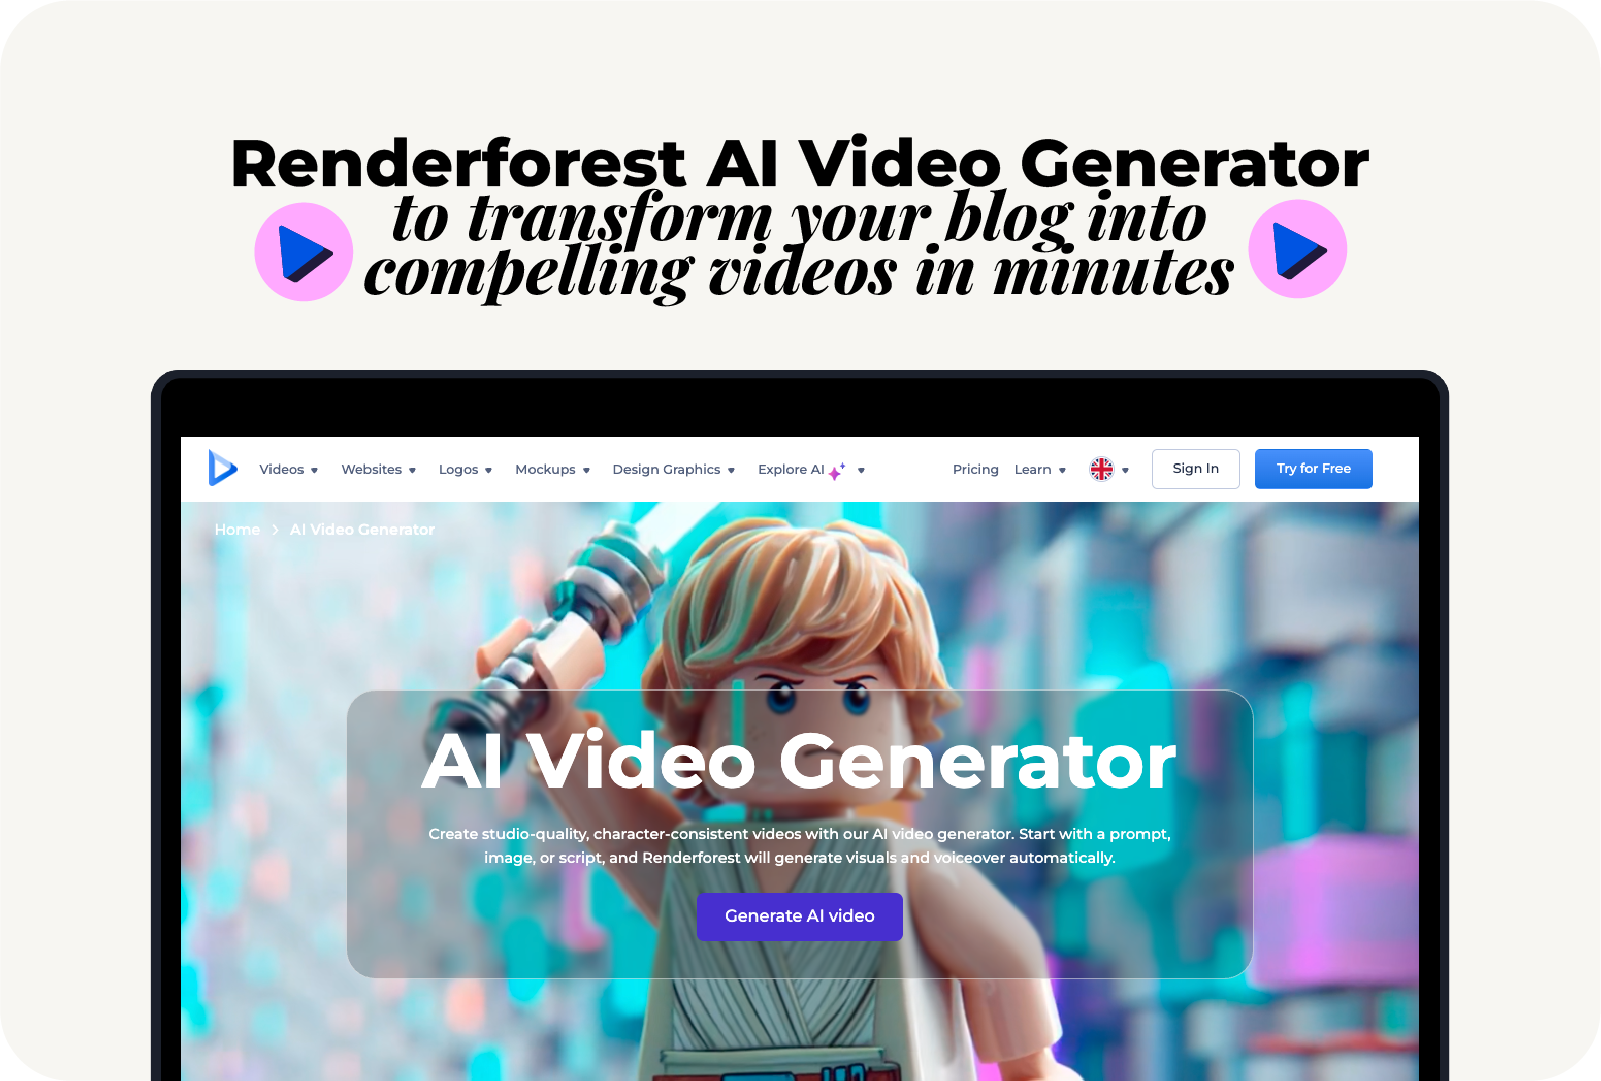
Renderforest’s AI Video Generator can help create videos from text, images, or scripts, with visuals, voiceover, and editing handled in one place. For more control, you can refine the draft in Renderforest’s AI Video Editor, adjusting scenes, text, visuals, transitions, music, aspect ratio, language, and layout before export.
The best blog-to-video workflow is simple:
Converting a blog post into a video does not mean copying every paragraph onto the screen.
It means turning the article’s main idea, structure, examples, and takeaways into a visual story. A blog is built for reading. A video is built for watching and listening. That means the article needs to be compressed, reorganized, and made visual.
A good blog-to-video conversion usually works like this:
This distinction matters. A weak blog-to-video workflow creates a slideshow of text. A strong workflow turns the article into a clear video with pacing, visuals, narration, and a reason to keep watching.
Turning blog posts into videos is one of the most practical ways to get more value from content you already have.
A blog post usually takes research, writing, editing, examples, keyword planning, and publishing work. Once it is live, it should not be limited to readers who find it through search or your website. A video version gives the same idea a second life on channels where people prefer watching instead of reading.
Blog-to-video repurposing can help you:
It is also useful because the blog post already gives you the hardest parts: the topic, structure, and message. AI speeds up the production side, but the strategy still starts with choosing the right article.
Not every blog post should become a video.
Some articles work beautifully as videos because they have a clear structure, strong takeaways, and visual potential. Others are too abstract, too technical, too outdated, or too dependent on long paragraphs.
Start with blog posts that already have a strong reason to be visual.
Avoid converting posts that are too abstract, too text-heavy, outdated, based on nuance that cannot be summarized easily, dependent on long quotes or legal detail, missing a clear takeaway, or written only for deep reading rather than visual explanation.
Start with a blog post that has a clear promise.
Good examples include “How to create a product demo video,” “10 social media video ideas for small businesses,” “How to make a YouTube intro,” “Logo file formats explained,” or “Best AI video tools for marketers.”
Weak examples include old announcements, very short updates, dense opinion pieces with no clear structure, posts that depend on lots of tables or legal language, or topics with no visual examples.
The best blog-to-video candidates already have strong headings, practical takeaways, and a clear audience.
Before opening an AI tool, decide what the video is really about.
A blog post can cover many subtopics. A video should usually focus on one main idea. Ask:
For example, if the blog post is “How to convert a blog post into a video,” the core message could be:
You do not need to create video content from scratch. You can repurpose your best blog posts into useful videos by turning the article structure into a shorter script and editing the AI-generated draft.
That core message becomes the spine of the video.
Use the blog structure as a starting point, but do not keep everything.
A blog section can become one video scene, but only if it supports the main idea. Most videos do not need every paragraph. They need the few points that move the viewer forward.
A good video flow usually needs fewer scenes than you think. Five to eight scenes are often enough for a short educational video.
This is the most important step.
A 2,000-word blog post cannot become a good two-minute video without compression. Video needs shorter sentences, clearer transitions, and less detail.
A useful structure:
A simple script might look like this:
Hook: You already have video ideas sitting in your blog archive.
Context: A strong blog post already has the topic, structure, and message. AI can help turn that written content into a video draft much faster than starting from zero.
Main points: Choose a blog post with a clear takeaway. Shorten it into a script. Turn the headings into scenes. Generate a video draft. Then edit the visuals, captions, voiceover, and branding before publishing.
CTA: Start with one high-performing blog post and turn it into a short video for your blog, YouTube, and social channels.
That is much better than pasting a full article into a video tool and hoping the result feels natural.
Once you have a focused script, use an AI video tool to create the first draft.
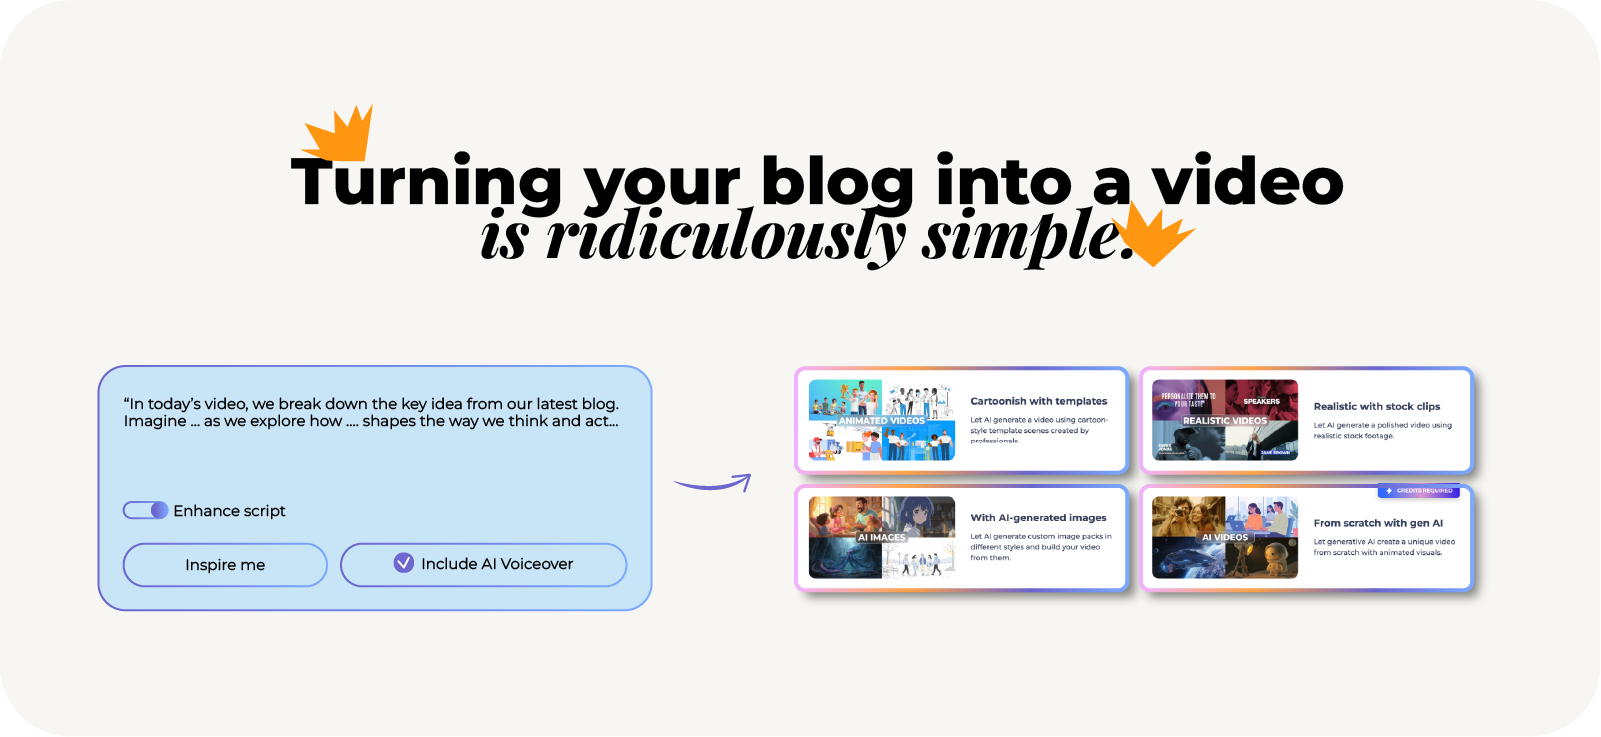
With Renderforest’s Text-to-Video AI, you can turn written text into a video draft and choose elements like video type, language, screen size, and visual style before refining the result. This works well when your blog post has already been compressed into a short script.
When generating the first draft, include clear direction:
Example prompt:
Create a 90-second educational video from this blog script. The audience is small business owners who want to repurpose blog posts into videos. Use a clear, practical tone. Format: 16:9 for YouTube and blog embed. Style: modern, clean, marketing-focused. Include captions, simple transitions, and a final CTA to try Renderforest’s AI Video Generator.
The more specific the input, the better the draft.
The first AI draft is not the final video.
Open the draft and review every scene. Check whether the visuals match the message, the voiceover sounds natural, the captions are correct, and the pacing feels right.
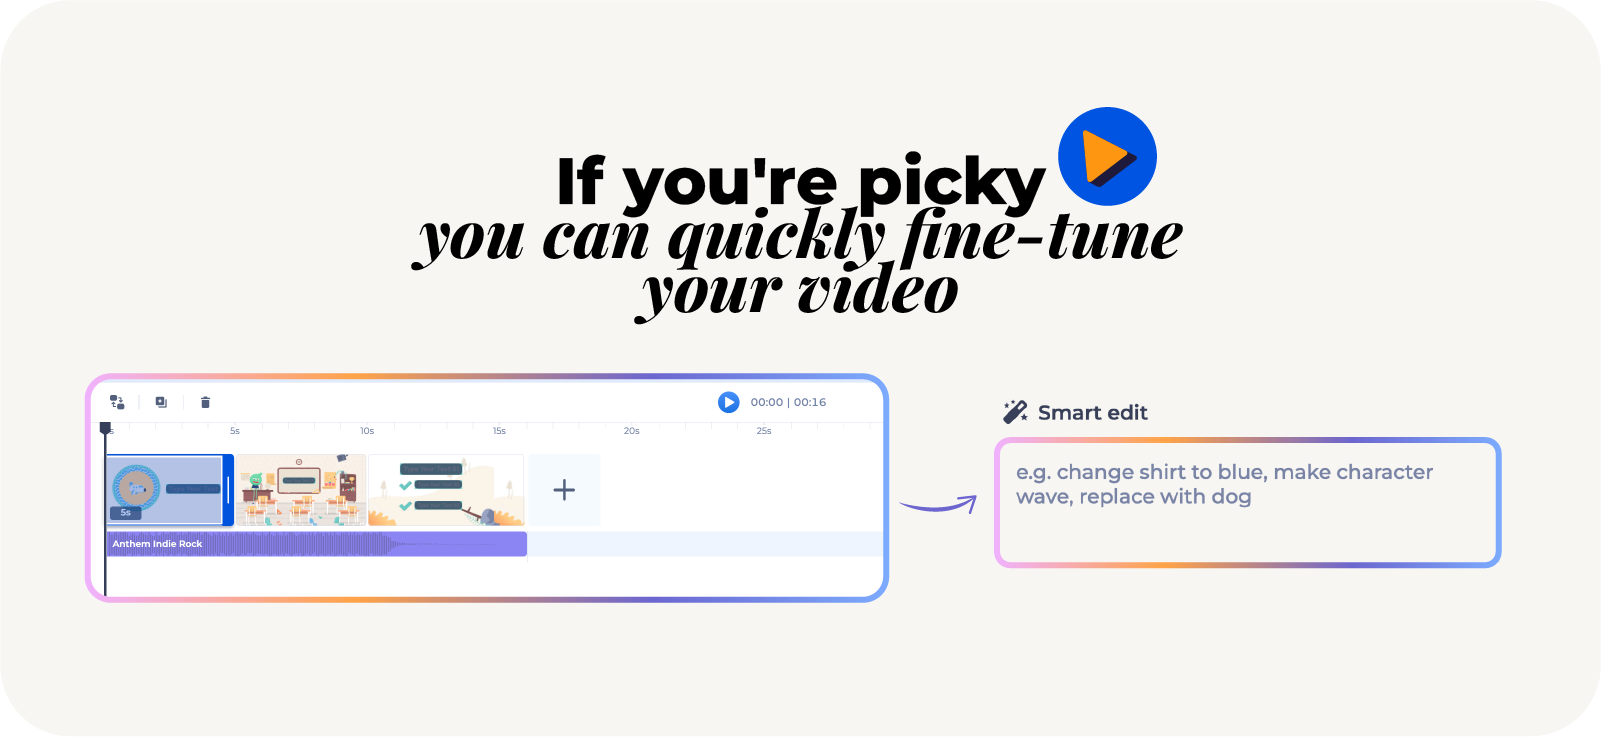
With Renderforest’s AI Video Editor, you can refine the project by editing scenes, replacing visuals, adjusting text, changing transitions, modifying music, choosing aspect ratios, and updating language or layout.
Look for:
This is where the video becomes useful instead of just generated.
A blog-to-video asset should feel like part of your brand.
Add:
The CTA should match the goal of the video. Examples include “Read the full guide,” “Try the AI Video Generator,” “Watch the full tutorial,” “Download the checklist,” “Explore more video templates,” or “Create your video with Renderforest.”
Do not add five CTAs. One clear next step is better.
Do not export one version and post it everywhere.
Different platforms need different formats and pacing.
A single blog post can become a longer YouTube video, a short social clip, a LinkedIn summary, and an embedded video at the top of the original article. That is how repurposing becomes efficient.
Blog-to-video conversion needs more than a text box. A useful workflow needs script generation, scene structure, visuals, voiceover, editing, branding, and export controls.
That is where Renderforest fits well.
Renderforest’s AI Video Generator is built for creating videos from text, images, or scripts, with visuals, voiceover, and editing handled in one place. Its AI Video Editor gives users more control after the draft is created, letting them adjust scenes, visuals, text, transitions, music, aspect ratio, language, and layout.
For blog-to-video projects, that matters because the article has to become a video structure, not just a visual document.
Renderforest is especially useful for marketers repurposing blog posts, small businesses creating educational content, agencies turning client articles into social assets, bloggers expanding into video, educators turning written guides into explainers, product teams creating quick tutorials, and SEO teams improving content experience with embedded video.
The biggest benefit is speed with control. AI creates the draft, but you can still adjust the output before publishing.
The biggest mistake in blog-to-video conversion is trying to include too much.
A blog post can be 1,500 to 3,000 words. A short video script may only need 150 to 400 words. Even a longer YouTube video usually needs a tighter structure than the original article.
Blog version: Producing video consistently is time-consuming, expensive, and difficult for small teams.
Video version: Creating videos from scratch takes time. But your blog posts already contain ideas you can turn into video.
Blog version: This article explains how to use AI tools to convert blog posts into videos.
Video version: In this video, you’ll learn how to turn a blog post into a polished video using AI.
Choose three to five ideas. For this topic, those might be: choose the right article, shorten it into a script, generate a video draft, edit scenes and captions, and publish different versions.
If the blog says “use your headings as video scenes,” the video can show a blog outline turning into scene cards. If the blog says “publish on multiple platforms,” the video can show export formats for YouTube, LinkedIn, TikTok, and blog embed.
A video should not end vaguely. Give the viewer one next action.
Example:
Turn one of your best blog posts into a video with Renderforest’s AI Video Generator.
Different articles need different video formats.
The goal is to match the article’s structure to the right video style. A how-to guide should not be treated like a case study. A listicle should not become a long narration with no visual rhythm.

Once the video is ready, publish it where it can support the original article and reach new audiences.
This should usually be the first step.
Embedding the video near the top of the blog post gives visitors a choice: read the full article or watch the summary first. It can also make the page feel more useful, especially for people who prefer visual explanations.
Use the embedded video to summarize the article, introduce the topic, explain a process, show product steps, support readers who skim, and create a stronger first impression.
YouTube is a strong fit for educational blog-to-video content.
Good candidates include tutorials, how-to guides, product explainers, beginner guides, comparison videos, and long-form educational topics. Use a clear title, description, chapters where relevant, and a link back to the full blog post.
LinkedIn works well for B2B takeaways, marketing advice, product education, founder insights, and professional how-to content.
Keep the video focused. A 60–90 second version with one strong takeaway often works better than a full article summary.
Short-form platforms need speed.
Use one idea from the blog post, not the entire article. For example: one mistake to avoid, one tip from the guide, one surprising stat, one before-and-after example, or one quick tutorial step.
Renderforest also has platform-specific AI tools such as the AI TikTok Video Generator and AI Reel Generator, which can be useful when turning blog ideas into short vertical videos.
A blog-to-video asset can improve an email newsletter because it gives readers a quick way to understand the article before clicking.
Use a thumbnail, a short teaser, one clear benefit, and a link to the full article or video.
If the blog post supports a product, feature, or campaign, turn the main idea into a short explainer for a landing page.
This works well for product launches, feature education, campaign pages, onboarding pages, webinar signups, and lead magnets.
One blog post can become more than one video.
For example, this article could become a 3-minute YouTube tutorial on converting blogs into videos, a 45-second LinkedIn video about choosing the right blog post, a 30-second Reel about not pasting the whole article into AI, a short product demo showing Renderforest’s AI Video Generator, an FAQ clip answering “Should I embed the video back into the blog?”, and an email teaser linking to the full guide.
For news-style updates or timely summaries, selected blog sections can also be repurposed with Renderforest’s AI news generator.
That is the real value of blog-to-video repurposing. You are not only making one video. You are turning one article into a small content system.
Before publishing, review the video like an editor, not just a user of an AI tool.
Check:
AI can create the first draft. This checklist helps make the final version useful.
AI can speed up blog-to-video production, but it does not always understand what matters most.
Common problems include:
This is why human review is still important.
A blog post is not just text. It has context, hierarchy, audience intent, and a point of view. AI can help translate the content into video, but a person should still decide what matters, what to cut, and how the final video should feel.
The best workflow is:
Article → summary → script → AI draft → human edit → branded video → platform-specific exports.
Converting blog posts into videos with AI is one of the most efficient ways to extend the life of your content.
The key is to treat AI as a production assistant, not a replacement for strategy. Start with the right article. Extract the main idea. Turn the structure into scenes. Shorten the script. Generate a draft. Then edit the visuals, voiceover, captions, branding, and CTA until the video feels clear and useful.
Renderforest is a strong fit for this workflow because its AI Video Generator, Text-to-Video AI, and AI Video Editor support the full process: turning text or scripts into video drafts, then refining the result with scene editing, visuals, voiceover, layout, music, and export options.
The smartest place to start is not with every blog post in your archive. Start with one article that already performs well, answers a clear question, or explains a useful process. Turn that into one strong video. Then repurpose it into versions for your blog, YouTube, LinkedIn, Reels, TikTok, and email.
That is how one article becomes a full video content engine.
Try Renderforest AI Video Generator and bring your best blog content to life.
Choose a blog post with a clear topic, shorten it into a video script, turn the main sections into scenes, generate a draft with an AI video tool, then edit visuals, captions, voiceover, branding, and CTA before exporting the final video.
Renderforest is a strong option for turning blog content into videos because it supports text/script-based video creation, editable scenes, voiceovers, templates, branding, and export options in one workflow.
AI can generate a video draft from blog content, but the result should still be edited. A full blog post is usually too long for a good video, so it is better to shorten the article into a focused script first.
Usually, no. It is better to paste the most important points or a shortened script. If you paste the entire article, the video may become too long, text-heavy, or unfocused.
For a short social or explainer video, a script of 150–400 words is usually enough. For a YouTube-style explainer, you may need more, but the script should still be tighter than the original blog post.
How-to guides, listicles, tutorials, beginner guides, case studies, comparison posts, checklists, and FAQ articles usually work well as videos because they have clear structure and practical takeaways.
Yes. A blog post can become a YouTube video if it has a clear topic and enough substance. Turn the article into a script, generate scenes, add visuals and voiceover, then export in a 16:9 format for YouTube.
Yes. One blog post can become several short videos by turning each main section, tip, statistic, example, or FAQ into a separate clip for LinkedIn, Reels, TikTok, YouTube Shorts, or email.
Yes. Embedding the video in the original blog post gives visitors a choice between reading and watching. It can make the article more useful and improve the content experience.
Yes. AI-generated videos should be reviewed before publishing. Check the visuals, captions, voiceover, pacing, branding, CTA, and platform format. AI creates the draft, but human editing makes it stronger.
Check the hook, script clarity, visuals, captions, voiceover, brand consistency, CTA, aspect ratio, video length, and platform requirements. Also make sure the video matches the original article’s message.
Blog-to-video content helps you repurpose existing articles into new formats for YouTube, social media, email, landing pages, and embedded website content. It lets one blog post support multiple channels without starting from scratch.
Share this


Article by: Renderforest Staff
Dive into our Forestblog of exclusive interviews, handy tutorials and interesting articles published every week!
Read all posts by Renderforest Staff