Video Editing
Editing interviews is one of the most challenging parts of presenting a good story. No matter how great your story or interviewee is, you need to find a great way to edit it, so it’s more grand and memorable.
There are several things to consider, when editing your videos – the duration, the style, the music track to go with it, etc. However, the good news is that you’re in the right place.
Renderforest offers many tools to help you make your interviews more outstanding in a matter of minutes. Upload your videos, or use our large collection of scenes, add your text, a music track to make it complete, and you’ll be ready to share it with the world.
Do you want to start editing your interview video right away? Well, let’s dive right in!
To start the editing process, you first need to Sign up or Sign in to Renderforest. Next, go to the “Create video” section on the main menu, and then click on the “Animated videos” subsection.
On the list, choose the “Video editing” option, which will offer you a number of promo video templates, from where you can choose any preset you want.
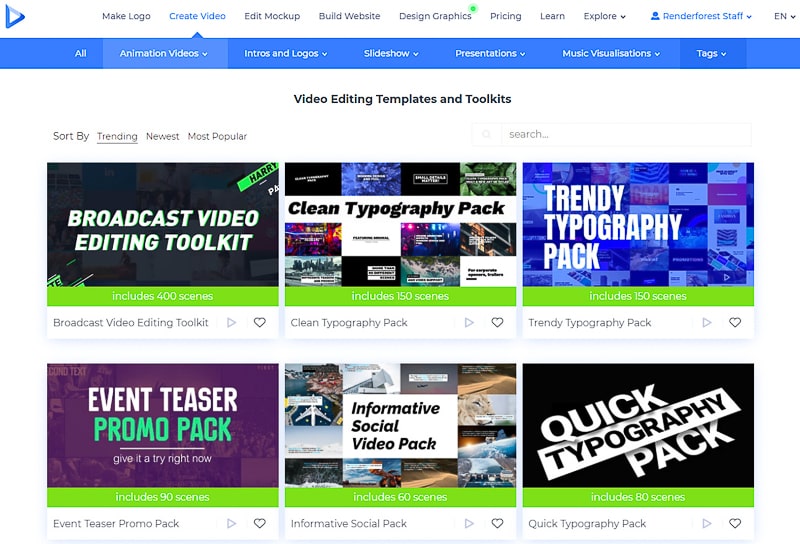
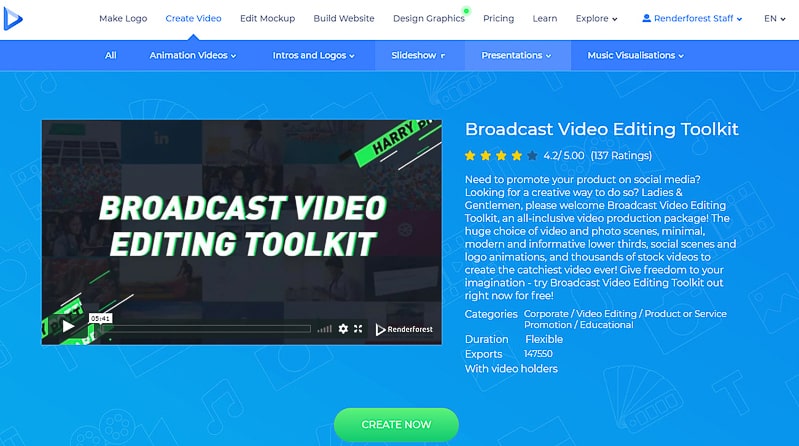
After choosing a template, click on the “Create now” button to start. For this tutorial, we’ve selected the “Broadcast Video Editing Toolkit”, with over 400 video and photo scenes, logo animations, tracks, fonts, and much more.
You will be offered two options to edit your video.
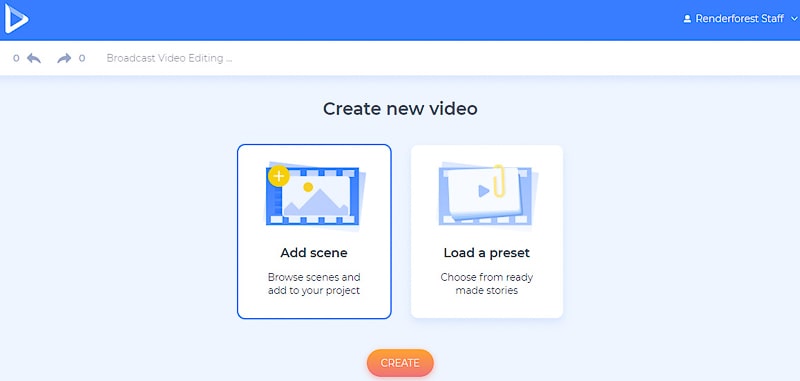
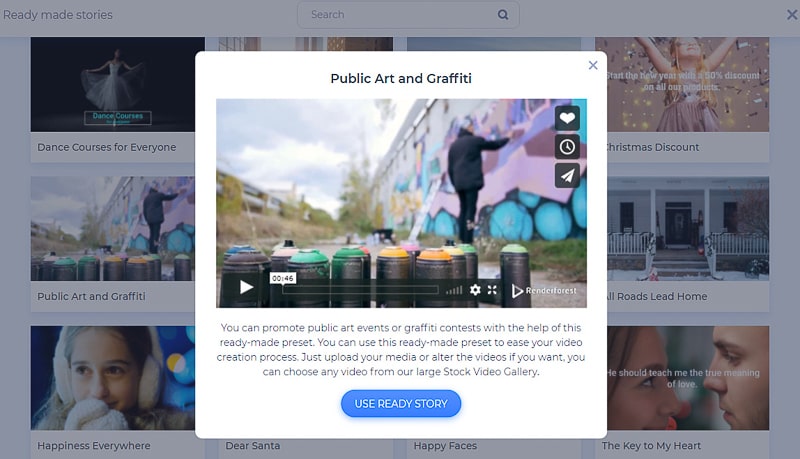
“Load a preset” option will offer you a list of presets, from where you can pick the one you need and start working on a ready-made video. Click on the preset and then the “Use ready story” button to start working on it.
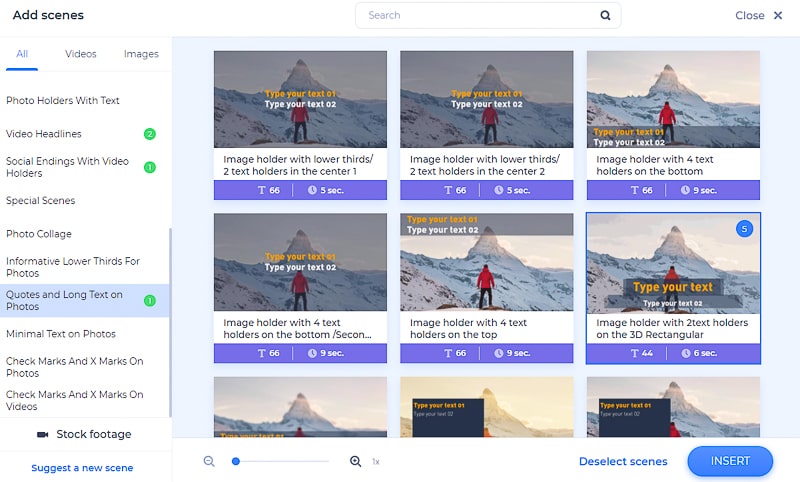
Since you are editing your interview and already have a video you want to work on, it’s better to choose the “Add scene” option. Here you will find a large collection of scenes to help you edit your interview. The scenes are all divided into categories, so it’s easy for you to choose exactly what you are looking for.
The scenes in the “Video headlines” category, will help you write the title of your interview on your video, or introduce your interviewee, display your name, and more.

If you want to add long texts to your photos, go to the “Quotes and long text on photos” categories. With the help of these scenes, you can add some quotes and pointers your interviewee has mentioned during the talk. Adding those long texts to your videos is also possible in the text holders of the “Text on videos” category.
Some scenes without text can be used in your video as well if you don’t want to overload your video with text.
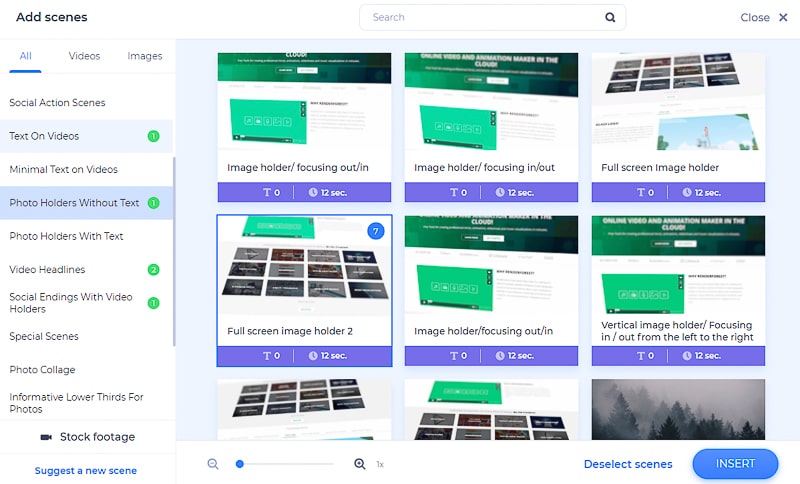
Another category you might like to choose a scene from is the “Social endings”. By selecting a scene from this category, you’ll be able to add the social media accounts of your interviewee and, of course, yours. This will help people find you on different platforms and wait for your next video.

The “Logo animations” category might also come handy if you have a logo and want to add it somewhere in the video.
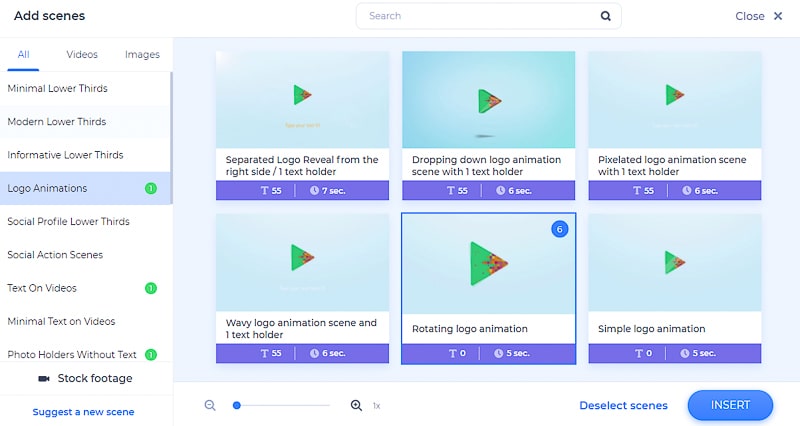
After selecting the scenes and media holders, that you need to edit your video with, click “Insert” to start working on your dashboard. Change the sequence of the scenes, by holding the mouse on the scene and dragging it to where you want it to be.
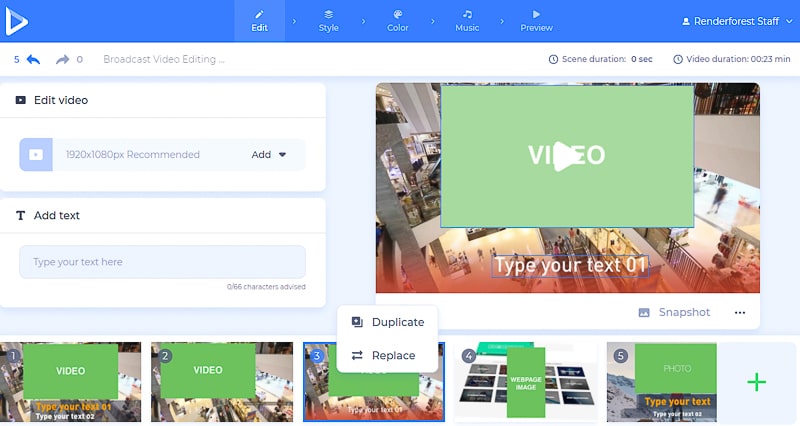
To add new scenes, click on the plus icon next to the scenes. And if you want to “Duplicate” or “Replace” them, click on the three-dot signs on every scene. Deleting the scenes you don’t want, is easy too – hover your mouse cursor over those scenes and click on the recycle bin icon.
Next, to add your interview videos, click on the video holder fields, and choose “Upload”, to add your media files to the scenes. “Video URL” or “Image URL” will help you add the media files from the web. And, if you’ve already uploaded your video, just click on the “Media library” option to choose it from your previous uploads.
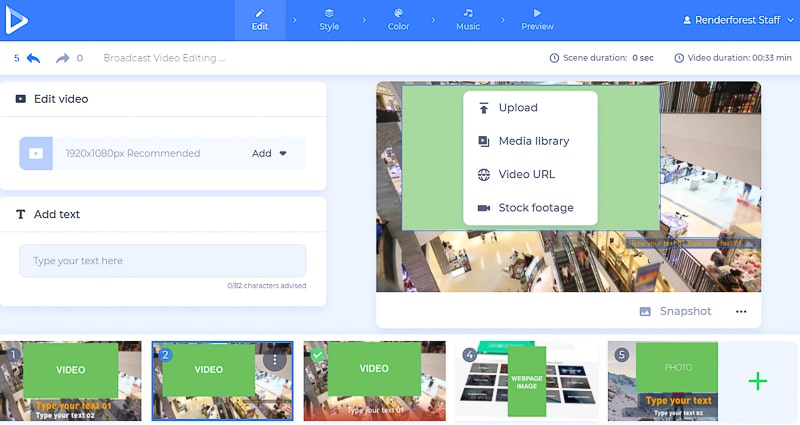
If you want a certain scene that you didn’t have a chance to shoot, click on the “Stock footage” or “Stock image” option and look through our collection by searching the topic you want. Once you choose a video, click “Insert” to add it to your scene.

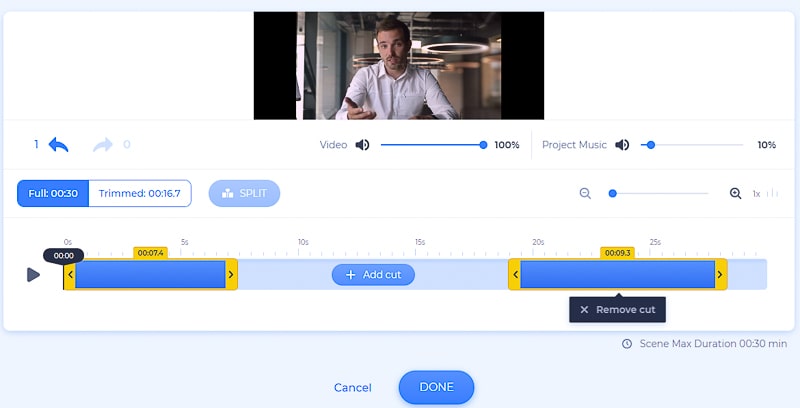
Right after you add your video with any of these options, and click “Insert”, you will be able to trim and split the video to take the parts you want. Click on the “Add cut” button, to cut more parts from your video, and “Remove cut”, if you change your mind.
To make the cuts more precise, zoom in and out of the video trimming field by clicking on the magnifying glass.
Mute or lower the project music and the voice of the video to adjust the video sounds. Make your interview videos more attractive by choosing a music track to play softly in the background, while your interviewees tell their stories.
You can crop, rotate, or apply our filters to the image files as well when editing your interview.

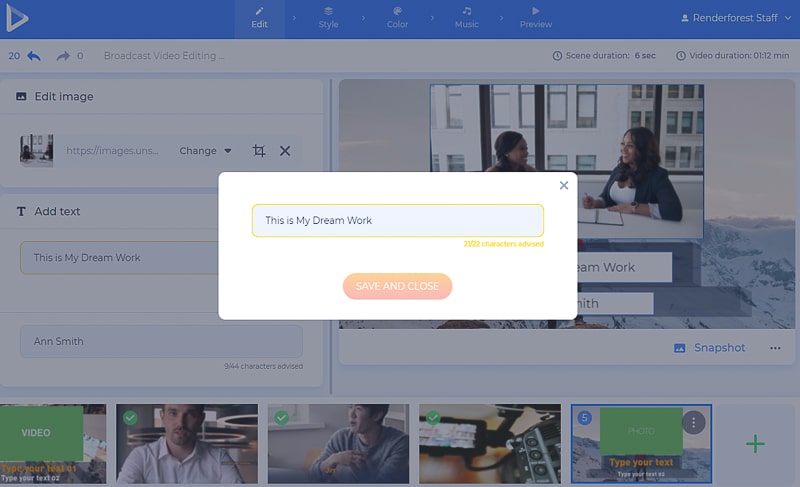
To add texts to your video, click on the text holders, and type in or paste your text.
You can finish your interview video with a scene promoting your social media pages and your logo. Don’t have a logo yet? Create one by clicking on the “Create logo” option. You can also create an animated one using the animation logo maker.

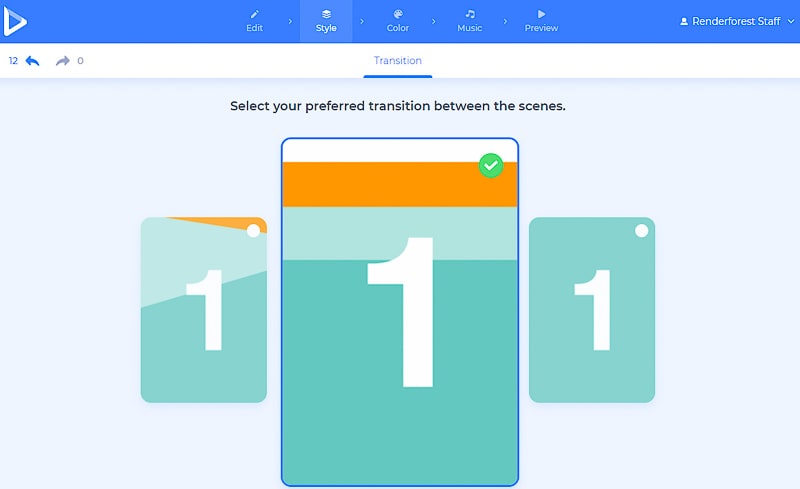
Next, go to the “Style” section, and choose a transition style for your video scenes.
In the “Color” section, you’ll find a suitable color combination for your scenes. If you don’t find what you’re looking for in our color combos, feel free to add your own color scheme in the “Custom color” section. Click on the “Generate” button, to preview the color changes on your scenes.

In the “Music” section, there is an option for you to add a voice-over to your interview, or record it on spot, cut, and take the part of the audio you need, lower the sound of the recording, replace it, or mute it completely. Note that the voiceover can be adjusted for each of the scenes.

If you want to add a music track to play in the background, select a track from our library, “Upload” one from your device or pick one from your previous uploads.

Now, you are all set to “Preview” your video, before downloading it.

We have two options for you to download your video. The first free option offers SD360 quality videos with the Renderforest watermark. You will be able to edit, download, and publish your videos whenever you want.
With the other “HD export” option, you can choose one of our paid subscriptions, and download your video with high-quality and no watermark. All the details about our pricing are available here.
There you go! Your interview video is now edited and ready to be shared with your followers. Have you already decided what video you are going to edit next?
You might also enjoy creating more videos with some of our other templates. Check them out below:
Edit your videos with this toolkit, using a large and impressive variety of scenes, image, video and text holders, outros and intros, and all this in one single template. Your videos can now be catchy, colorful, and professional-looking.
Edit your videos with this toolkit, full of about 300 scenes, transitions, music tracks, and all the things you need for a noteworthy video on social media. Try it right away and share it with the world!
Make people pay more attention, with colorful and stunning typography videos, suitable for promos, announcements, social media, and more. Start the experience right now!
Slay the new trends even in your videos. Make new promo, social, and YouTube videos, using contemporary fonts and creative transitions.
Inform, educate, or promote with awe-inspiring scenes, text, and music. Informative Social Pack will help you create noteworthy videos only in a few minutes. Give it a try!
Share this
Article by
Dive into our Forestblog of exclusive interviews, handy tutorials and interesting articles published every week!
Read all posts by Renderforest StaffCreate Professional
in Minutes without Technical Skills.


Create Professional
in Minutes without Technical Skills.
Sign Up Now. It’s Free!