Video Editing
Did you know that 44% of online shoppers who watch demo videos are more likely to make a purchase?
It doesn’t matter whether you offer a digital or a physical product, you need to find the best way to demonstrate it. Depending on how you do it, you might attract or lose your potential customers.
Product demo videos are one of the best ways for product promotion. They show what problems your product solves, how it solves them, and, in general, its features and how it is related to your potential customers.
There are no specific guidelines for creating a demo video, so it’s all up to your imagination and creativity. The only things to consider are the length and the given information, so make sure to keep your demo video short (up to 3 minutes) but informative.
If you think that creating demo videos is difficult and requires advanced technical skills, then you’ll be happily disappointed. Use our product demo video maker tool and have your video ready in a couple of minutes. In this article, we’ll show you exactly how to do it.
But before we get to work, check out this product demo video for an e-commerce platform created with our video maker. Note that to create a video, logo, or any other kind of project on our platform, you first need to sign up or sign in to your account.
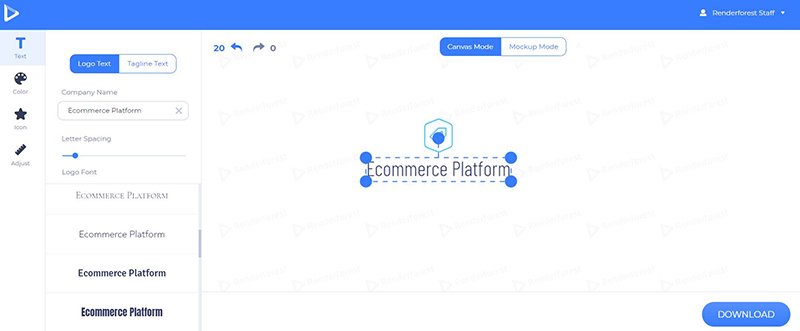
We’ve started with creating a logo for an e-commerce platform, using our logo maker.
To do so, go to the “Create logo” section from the top menu, view our logo templates, and pick the one you like. Once you choose a template, you’ll be able to edit it according to your preferences. The color, the font, and the icon of your logo are all adjustable. After making all the necessary changes, download your logo with any of the following options, to move on to the next step.
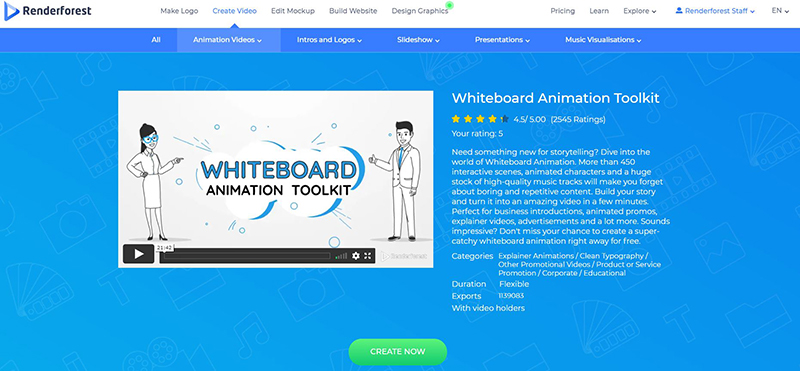
Then, it’s time to go to the “Create video” section and choose a template to start making your product demo video. In the “Product or service promotion” category located in our online animation maker, you’ll find many templates to pick from.

We’re going to work with the “Whiteboard Animation Toolkit” for this demo video tutorial. Click on “Create now” to start making a video.
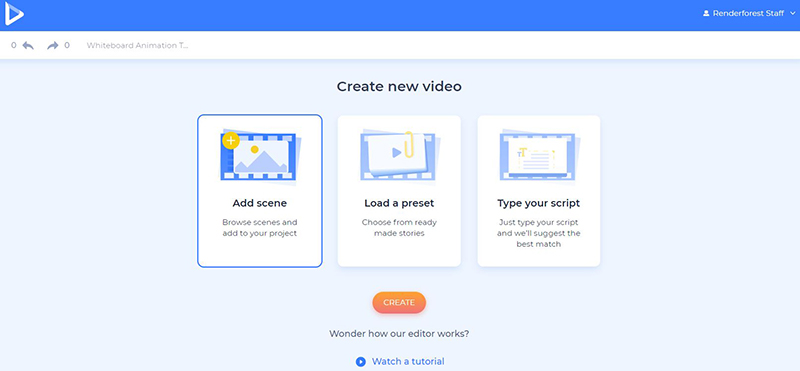
You have 3 options to create a video: by manually choosing the scenes, by selecting a ready-made story, or with our text-to-animation tool.
For this tutorial, we’ll choose the “Add scene” option, to select the scenes we need ourselves.
There are scenes for different topics and industries, like Technology and Devices, Brands and Products, Finances and Money, Problem Situations and Challenges, Healthcare and Real Estate, Office and Education, Food and Beverages, as well as many character animations and logo and media holders. After selecting the scenes you need to click “Insert” to add them to your dashboard and start the editing process.

Duplicate, replace, or delete the scenes you’ve chosen, or add some new ones by clicking on the plus sign next to the scenes.
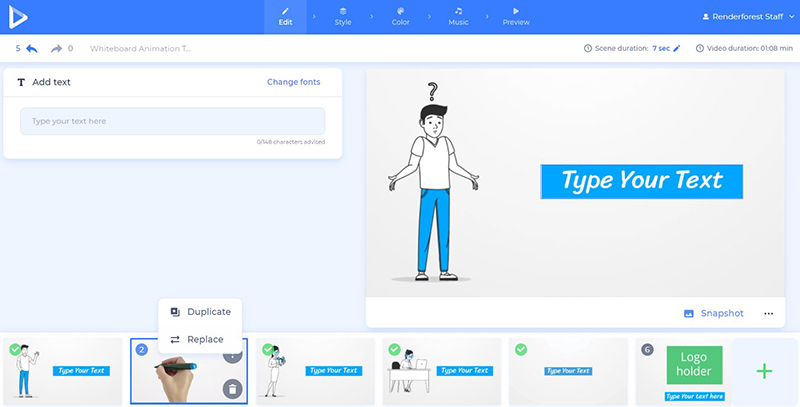
Now, it’s time to add your message by clicking on the text holder fields and typing in or pasting your text.

Remember the logo that we’ve created at the beginning of this tutorial? Now, we’ll need to add it to the demo video. To do so, click on the logo holder scene and select one of the options. Paste the image URL, upload it from your device, or choose it from your “Media library”, if you have already uploaded it before.

In this project, we don’t have a real-life video of the platform or a screen recording, but if you do, add it as well, to the scenes with video holders. There are 4 ways to add a media file to your project: insert the video URL, upload it from your device, select an already uploaded video from your “Media library”, or find a suitable video from our “Stock footage” library.

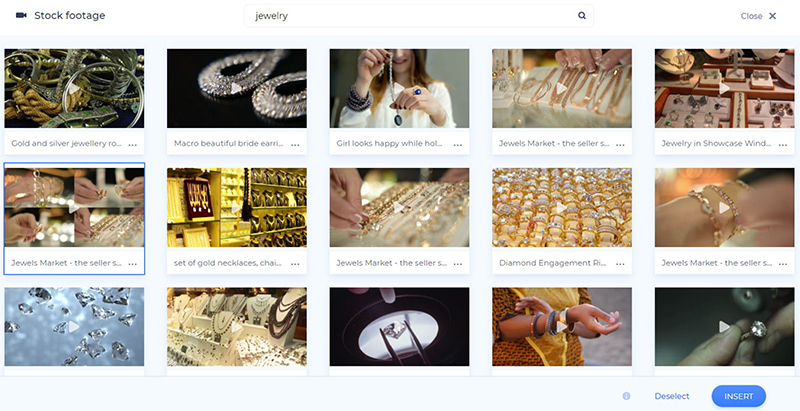
To find a relevant video in the “Stock footage” library, search for specific terms and keywords. Let’s try with the term “jewelry”. View the options and pick the one you like. Afterward, click “Insert”, to confirm it.
Once you add a video, you will have the option to trim it and select the parts you want to include in your demo video. Here you have the chance to change the volume of your video as well.

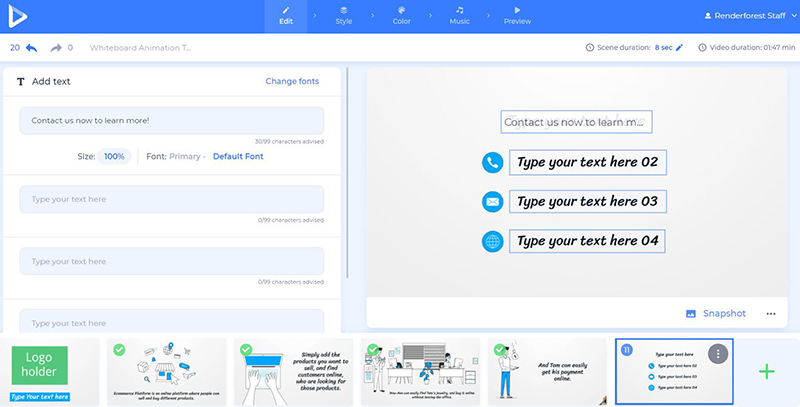
We’re ending our demo video with an outro that has contact icons and fields. In this scene, you can share your phone number, email address, and website.
After customizing the scenes, it’s time to choose the style of the demo video. There are 2 versions to choose from – “Board Drawn” and “Cut Paper”. Our video is created with the second style.

Change the style of your primary and secondary text too, by choosing a font and clicking “Generate” to apply the changes.

In the “Color” section, select the main color of your animation, and click “Generate” to confirm the new look of your video.

Here comes the final touch – music. Choose tracks from our “Music library” or upload your own music, to make it more personal.
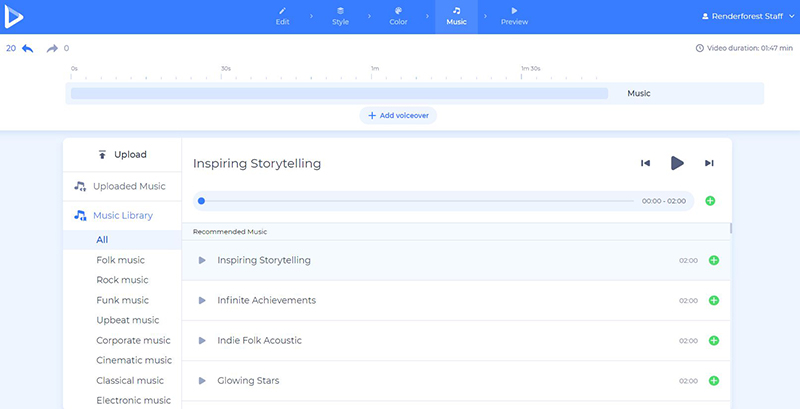
To make your video more dynamic and informative, upload a voiceover as well or record it right on spot.

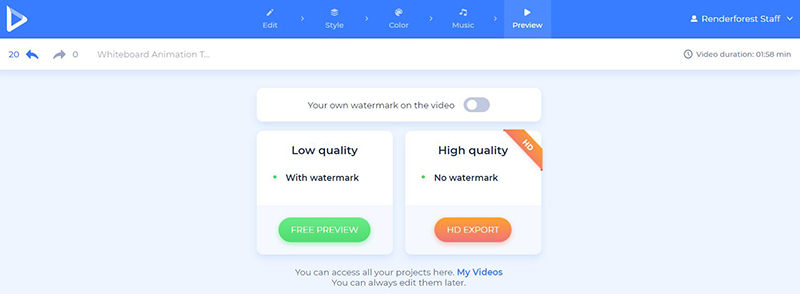
Now, it’s time for you to preview the demo video before downloading it. Click on “Free preview”, and the video will be ready in a few minutes for you to watch.
There are two options for you to download your video. The first one is the free option, which offers SD360 quality videos with the Renderforest watermark.
And with the “HD export” option you can download your video in high quality and without a watermark. Find more details about our pricing here.
Are you ready to create your product video now? Click on the button below to start your journey. You can then create an engaging outro for your video using the YouTube outro maker.
Introduce your product to your target audience with creative and awesome animations. Complete the video with music tracks, impressive styles, and scenes to increase the number of your sales.
Unique characters, soft shades, and a large collection of scenes in one pack. Promote your business, or demonstrate your products with creative and artistic solutions, using this lovely pack.
Explain complicated concepts or introduce your products with cute 3D characters, scenes, and icons. Choose styles, transitions, and music, to complete your video, and make it more perfect.
Share this
Article by
Dive into our Forestblog of exclusive interviews, handy tutorials and interesting articles published every week!
Read all posts by Renderforest StaffCreate Professional
with Renderforest All-In-One Design Platform.


Create Professional
with Renderforest All-In-One Design Platform.
Sign Up Now. It’s Free!