Video Editing
Realtors often face some issues in showing their houses to potential clients. Sometimes touring a property can be time-consuming and annoying both for realtors and buyers.
According to statistics, displaying property in video format results in 403% more inquiries than with other formats. So, there is no doubt that there is no better way to showcase a house than with a compelling video. They provide a full overview of the properties you’re selling or giving on rent.
Add property listings in your video and present their descriptions and facilities in a contemporary way. Besides, you can create real estate agent profile videos to let more people know them both personally and professionally.
Nowadays, you don’t need an expensive production agency or a freelancer to create a real estate video for you. With Renderforest, you can create your real estate agency videos and share them with your clients in a matter of minutes.
Have a look at the listing video below, created with one of our templates:
Did you like the video? If yes, follow the steps below to create a similar one with your own media files and descriptions. Let’s go!
First, go to the “Create video” section situated on top of the page, after signing up or signing in to your Renderforest account. In the “Animation videos” category there is a “Product or service promotion” subcategory, where you can find a large number of promotional templates. You can pick a template from this list, or find exactly what you need, using our advanced search filters.
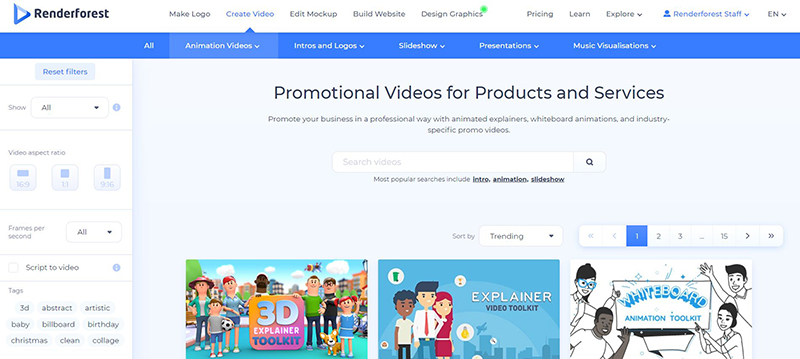
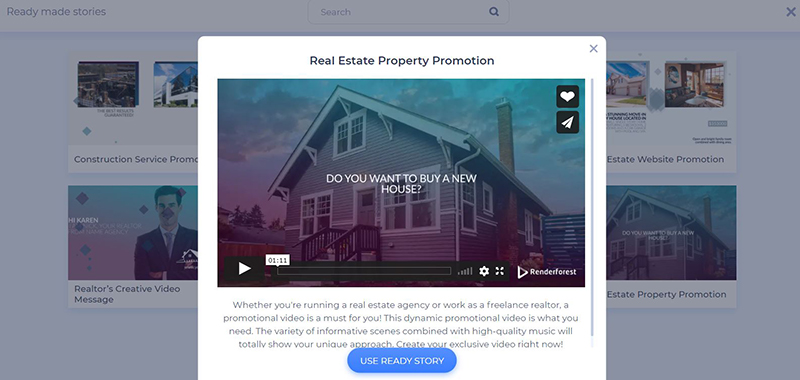
Once you find what you need, click “Create now” to start. The video above was created with our “Real Estate Marketing Slideshow” template.

Here you have two options to create your video: use one of our ready-made presets or create a completely new project by selecting the scenes manually.
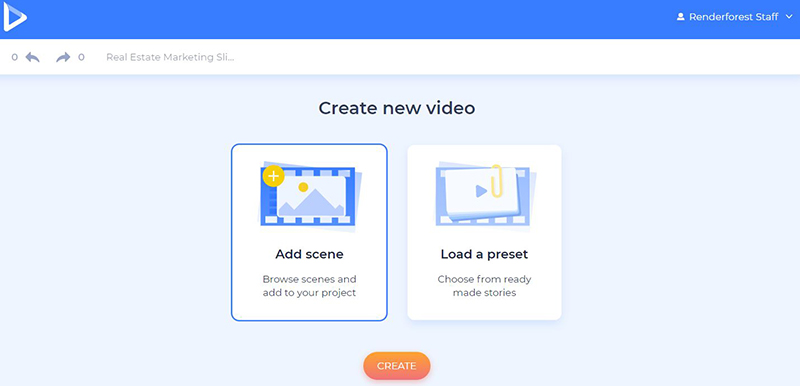
If you want to use one of the presets, click on “Load a preset” and go through the presets to find the perfect match.
We’ve used the “Real Estate Property Promotion” preset to create our video. In case you want to use it too, click on “Use ready story” and customize the scenes with your media files and descriptions.
However, if you don’t find any relevant presets for your project, click on “Add scene” and start creating your video from scratch. Select all the necessary scenes and click on “Insert”. This template offers six scene categories: title animations, agents introduction, photo holders, video holders, logo animations, and checkmarks.

After you choose all the scenes, you’ll be able to change their sequence, delete the ones you don’t need, replace them, or add additional ones.

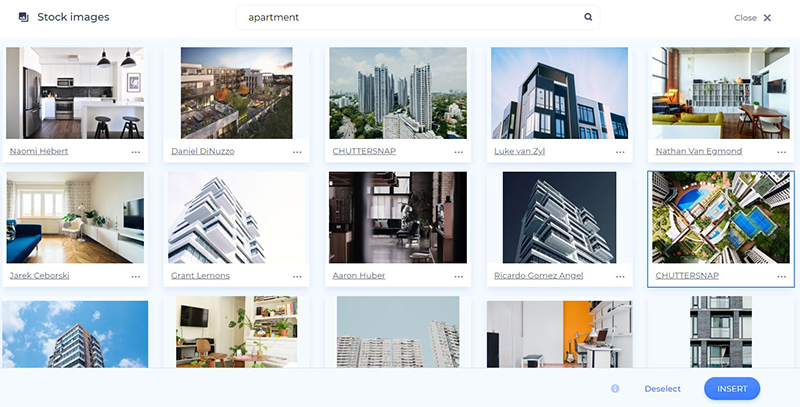
There are a couple of ways for you to add your media files: via image or video URL, by uploading them from your device, by picking an already uploaded file from your Media Library, or by choosing a media file from out stock.

There is a huge collection of photos and videos in our “Stock image” and “Stock footage” library. Type in the topic you need, choose a media file, and click “Insert”.
Once you add an image to your scenes, you’ll be able to crop and resize it to match the frame size of the image holder.

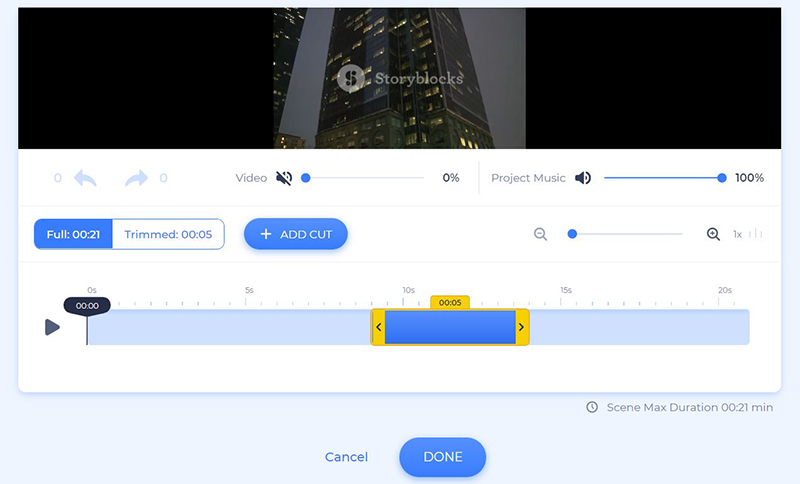
Videos in their turn can be trimmed and muted right in the editor. This means you don’t have to edit them beforehand.
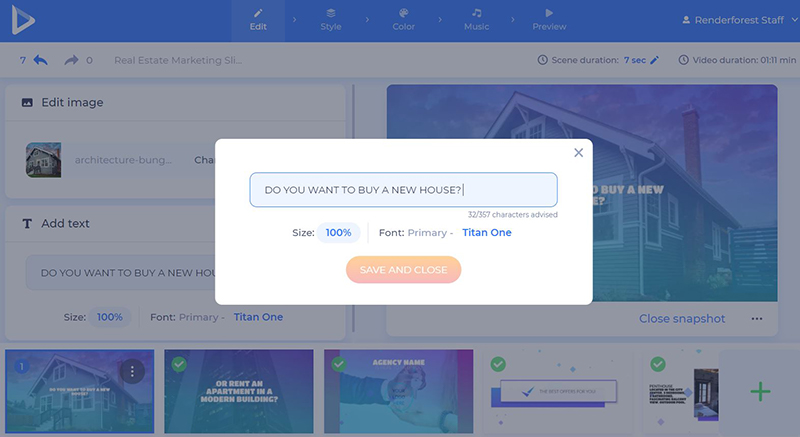
Add your data and contact information to the scenes with text holders, and make sure not to exceed the number of recommended characters. Click the “Save and close” button after typing in or pasting your text to save the changes.
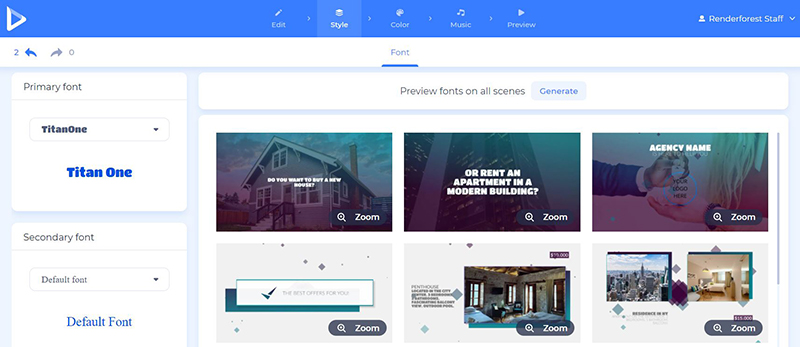
Moving on to the “Style” section, choose the font you prefer for your promo video text and click “Generate” to see how it looks in your scenes.
In the “Color” section, choose the color scheme of your video. If you have some other color combinations in mind, feel free to customize them in the “Custom colors” field. The “Generate” button will help you see the changes in your scenes.

Next, in the “Music” section add a track to your promo video to make it more dynamic. Choose one from our music library or upload a track from your device.

Adding a voiceover to your video is another great idea! Record or upload your voiceover right in the editor.

Your video is almost ready to be downloaded. Before that, make sure to “Preview” the video, to see the final result. Click on “Free Preview” and wait for a few seconds for it to be ready.
If there’s something you want to change, you can always go back to the editor and make the necessary changes.
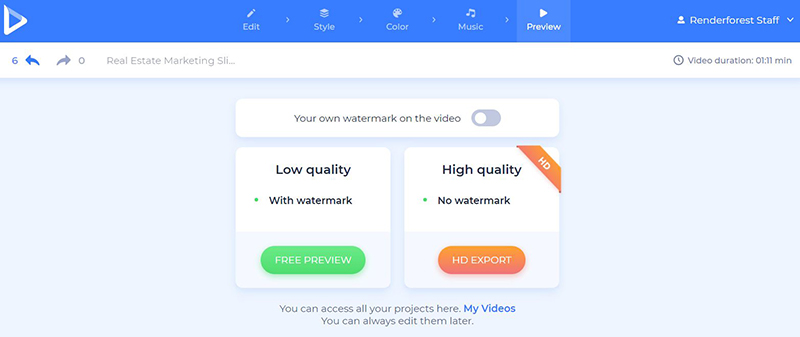
Once your video is final, download it with one of the following options:
The first one is the free option, which offers SD360 quality videos with a watermark. And the second one is the “HD export” option, with which you can choose one of our paid subscriptions and download your video with high quality and no watermark. All the details about our pricing are available here.
Create an informative real estate promotional video online. Help your properties shine and keep your clients impressed.
Click the button below to start:
Share this
Article by
Dive into our Forestblog of exclusive interviews, handy tutorials and interesting articles published every week!
Read all posts by Renderforest StaffCreate Professional
with Renderforest All-In-One Design Platform.


Create Professional
with Renderforest All-In-One Design Platform.
Sign Up Now. It’s Free!