AI
When you create an AI video, you usually start with a clear vision. You know what should appear on screen, how it should move, and the overall mood you’re aiming for. The hard part has always been keeping the style consistent.
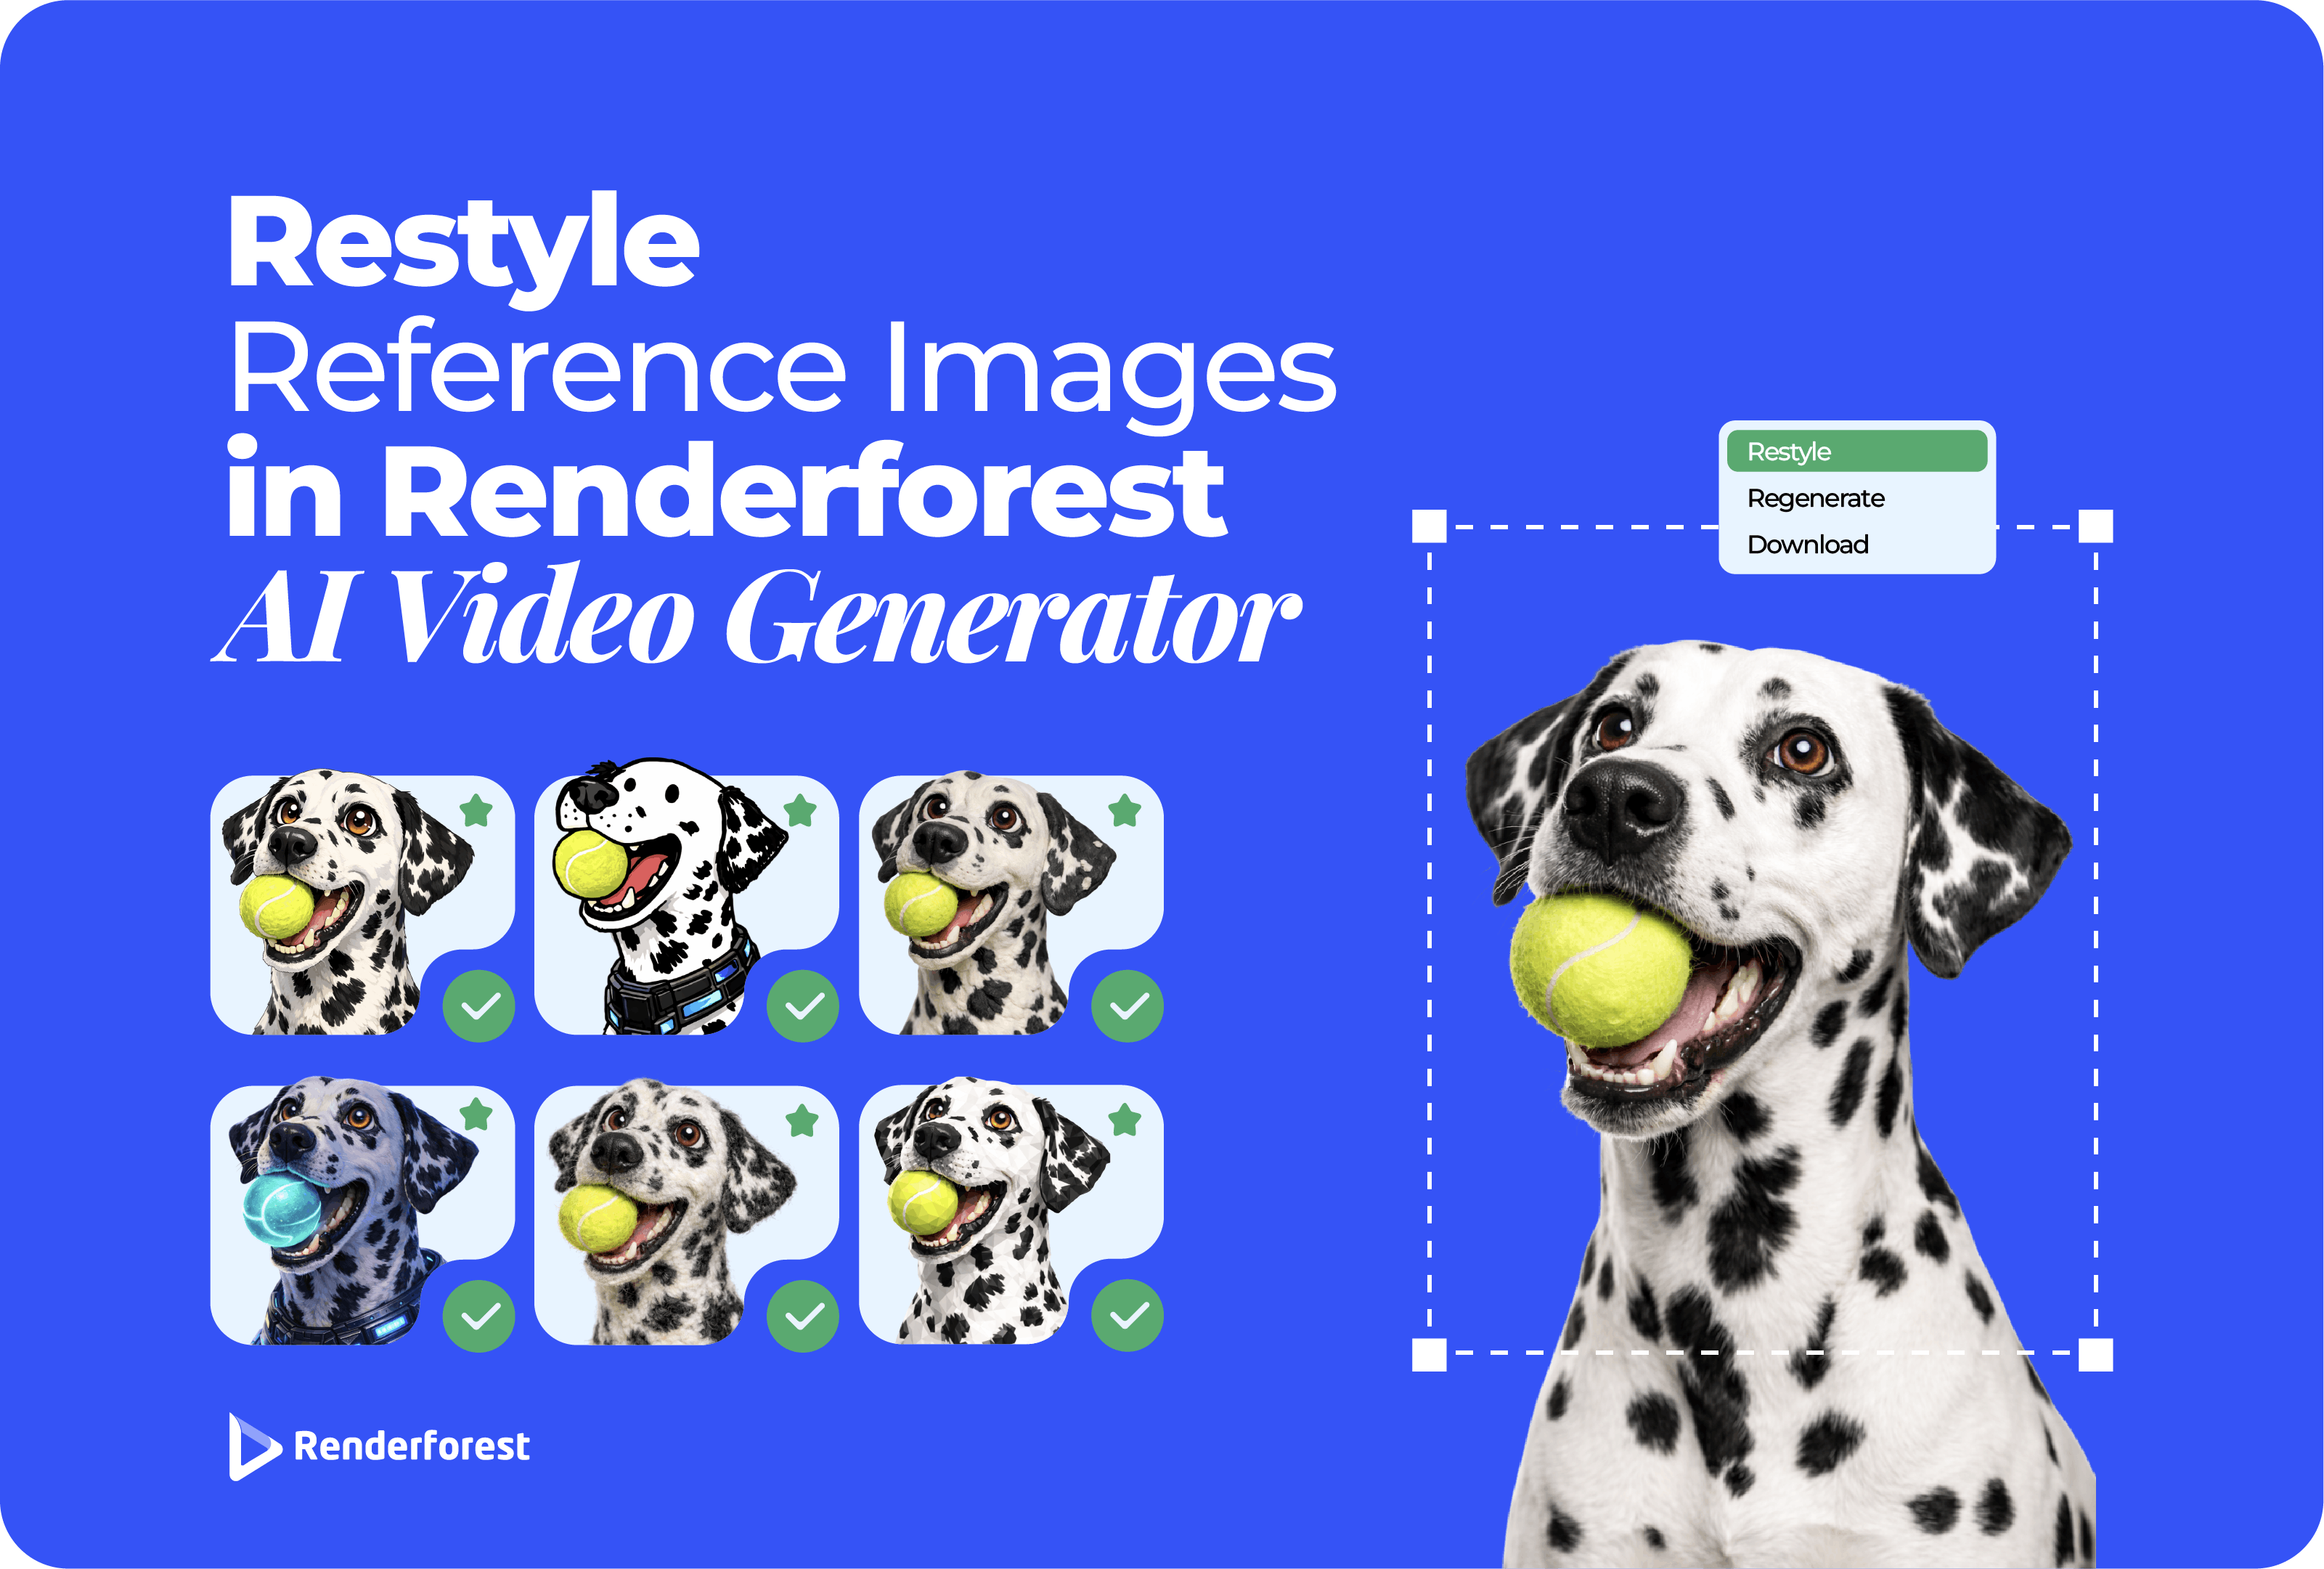
Even with a good reference image, results could drift. One clip might look slightly different from the next, especially if you’re generating multiple scenes or working toward a specific visual direction. That’s exactly what Reference Image Restyle in Renderforest’s AI Video Generator is designed to fix.
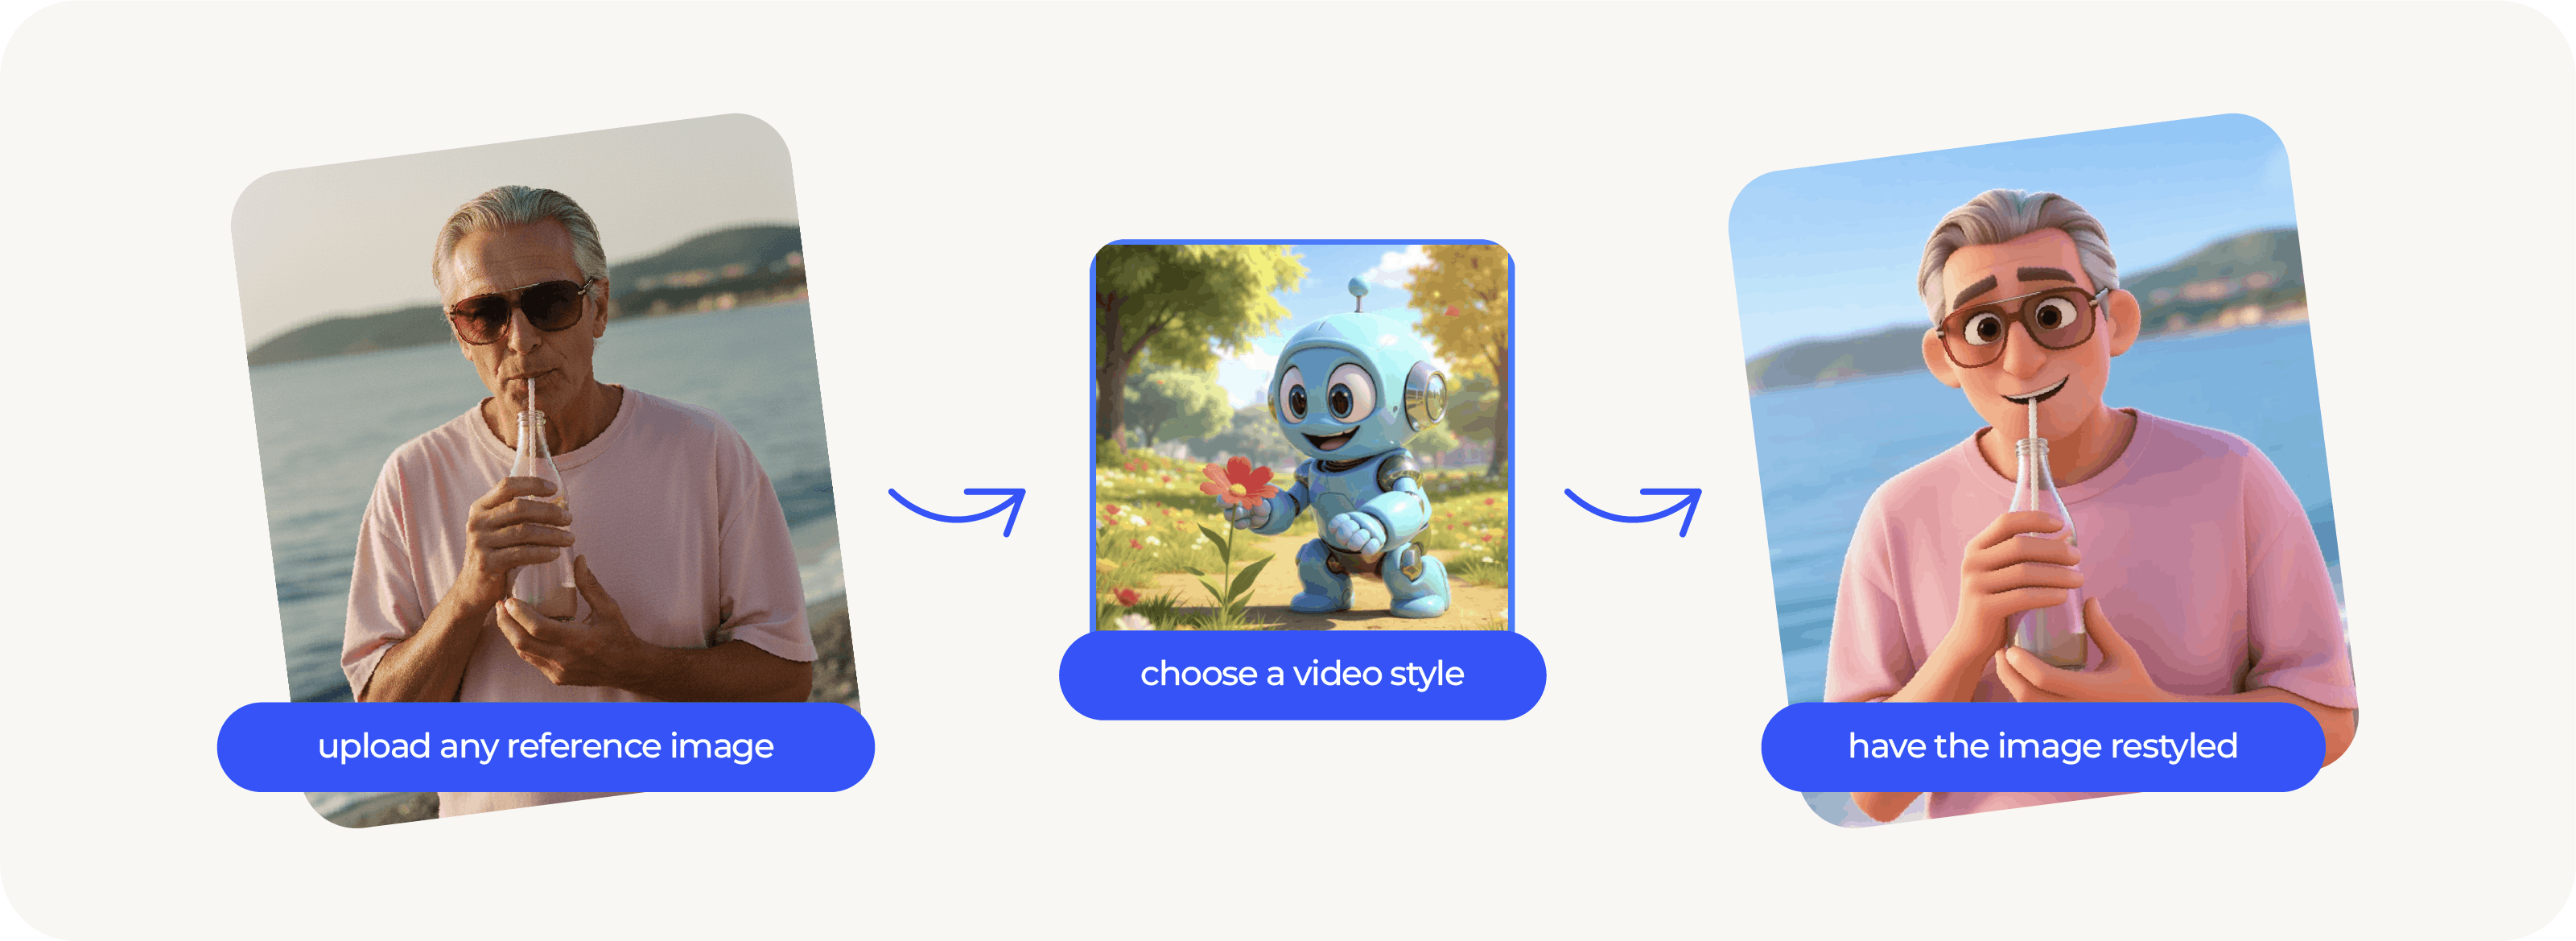
With this update, you can upload any reference image, choose a video style, and have the image restyled first – before animation even begins. The system adapts your image to match the selected style, then animates it.
Before this update, your reference image had a strong influence on the final look.
A photorealistic photo often produced realistic results. An illustration usually led to something stylized – but not always in the style you actually wanted.
Now, you can clearly separate:
This unlocks a few big advantages:
This is the exact workflow you’ll use to generate a video in a specific style – with more control and more consistent results.
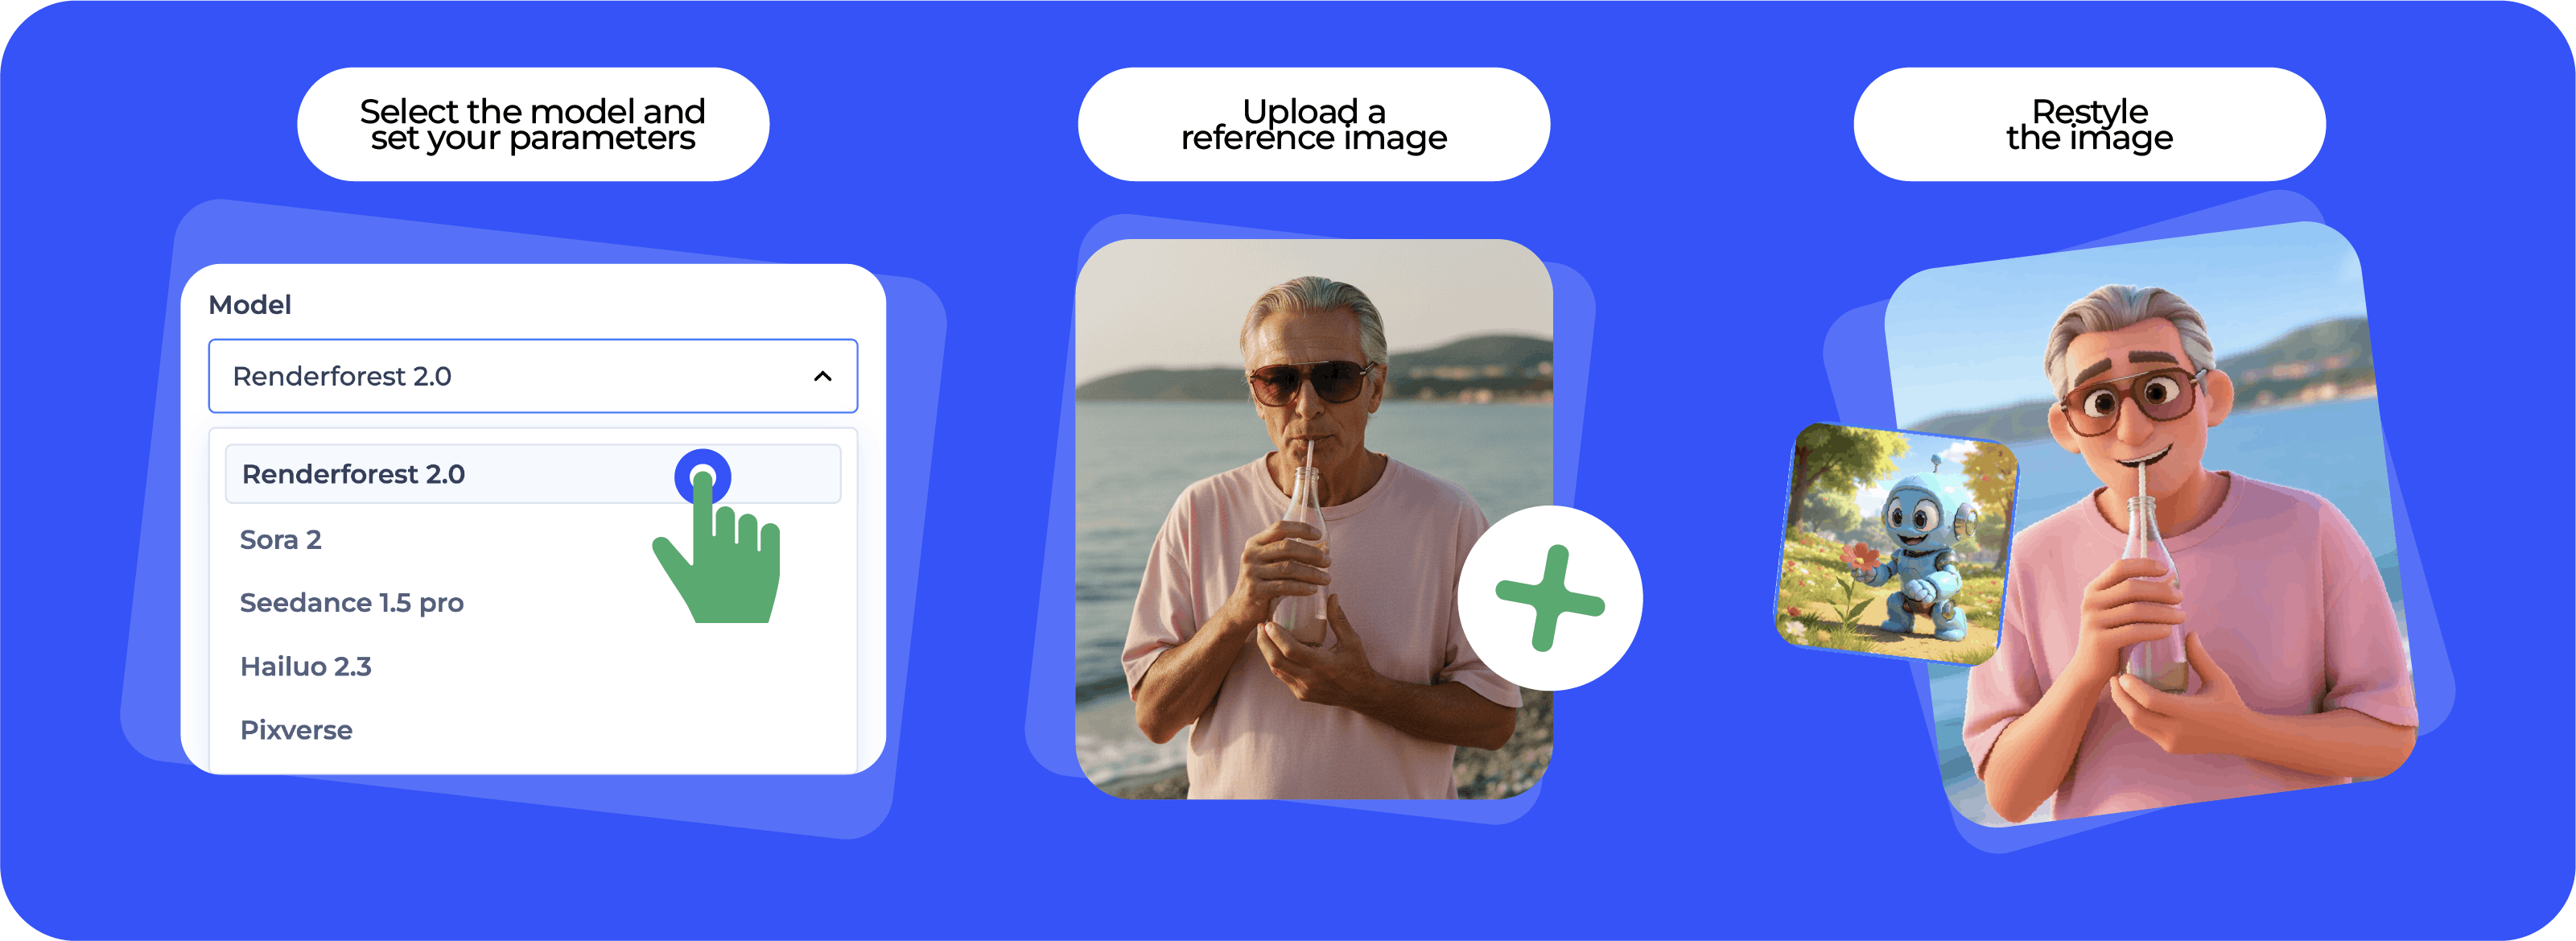
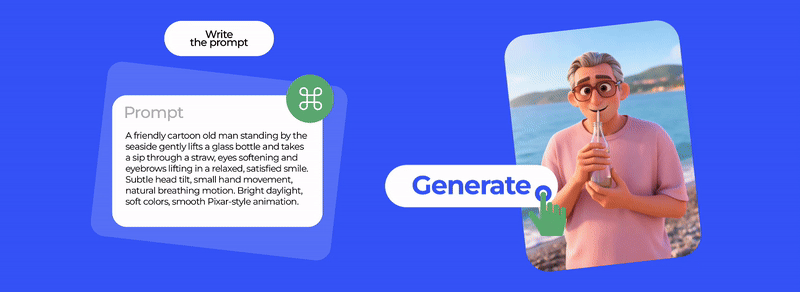
Start by choosing the model and setting the basics for generation, such as duration and resolution. This ensures the output matches your quality and format needs from the beginning.
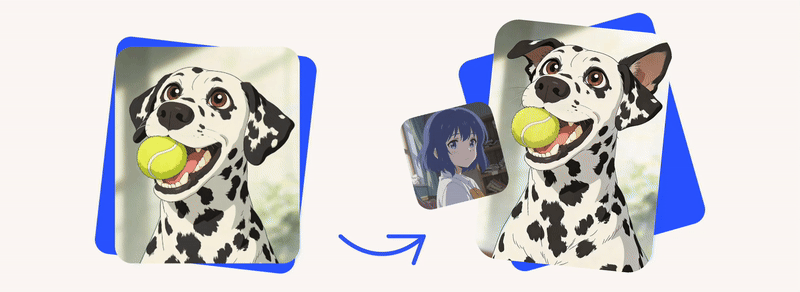
Add your image in the Reference Image section. The goal here is to give the AI a clean visual anchor for shape, composition, and key details.
Click Restyle Image to adapt your reference image into the style you want before animation begins.
Use the Prompt field to describe what should happen in the scene. Keep it simple, visual, and action-focused.
Include:
Click Generate to create your clip and preview the result. If it’s not perfect yet, don’t restart – use Re-generate to refine faster.
The quickest ways to improve results:

Reference Image Restyle isn’t limited to video. The AI Image Generator follows the same logic: start with a reference image, choose a style, and restyle it before generation.
This is especially useful when you want multiple visuals that feel like they belong together – social posts, ads, thumbnails, or brand illustrations – without redesigning everything from scratch.
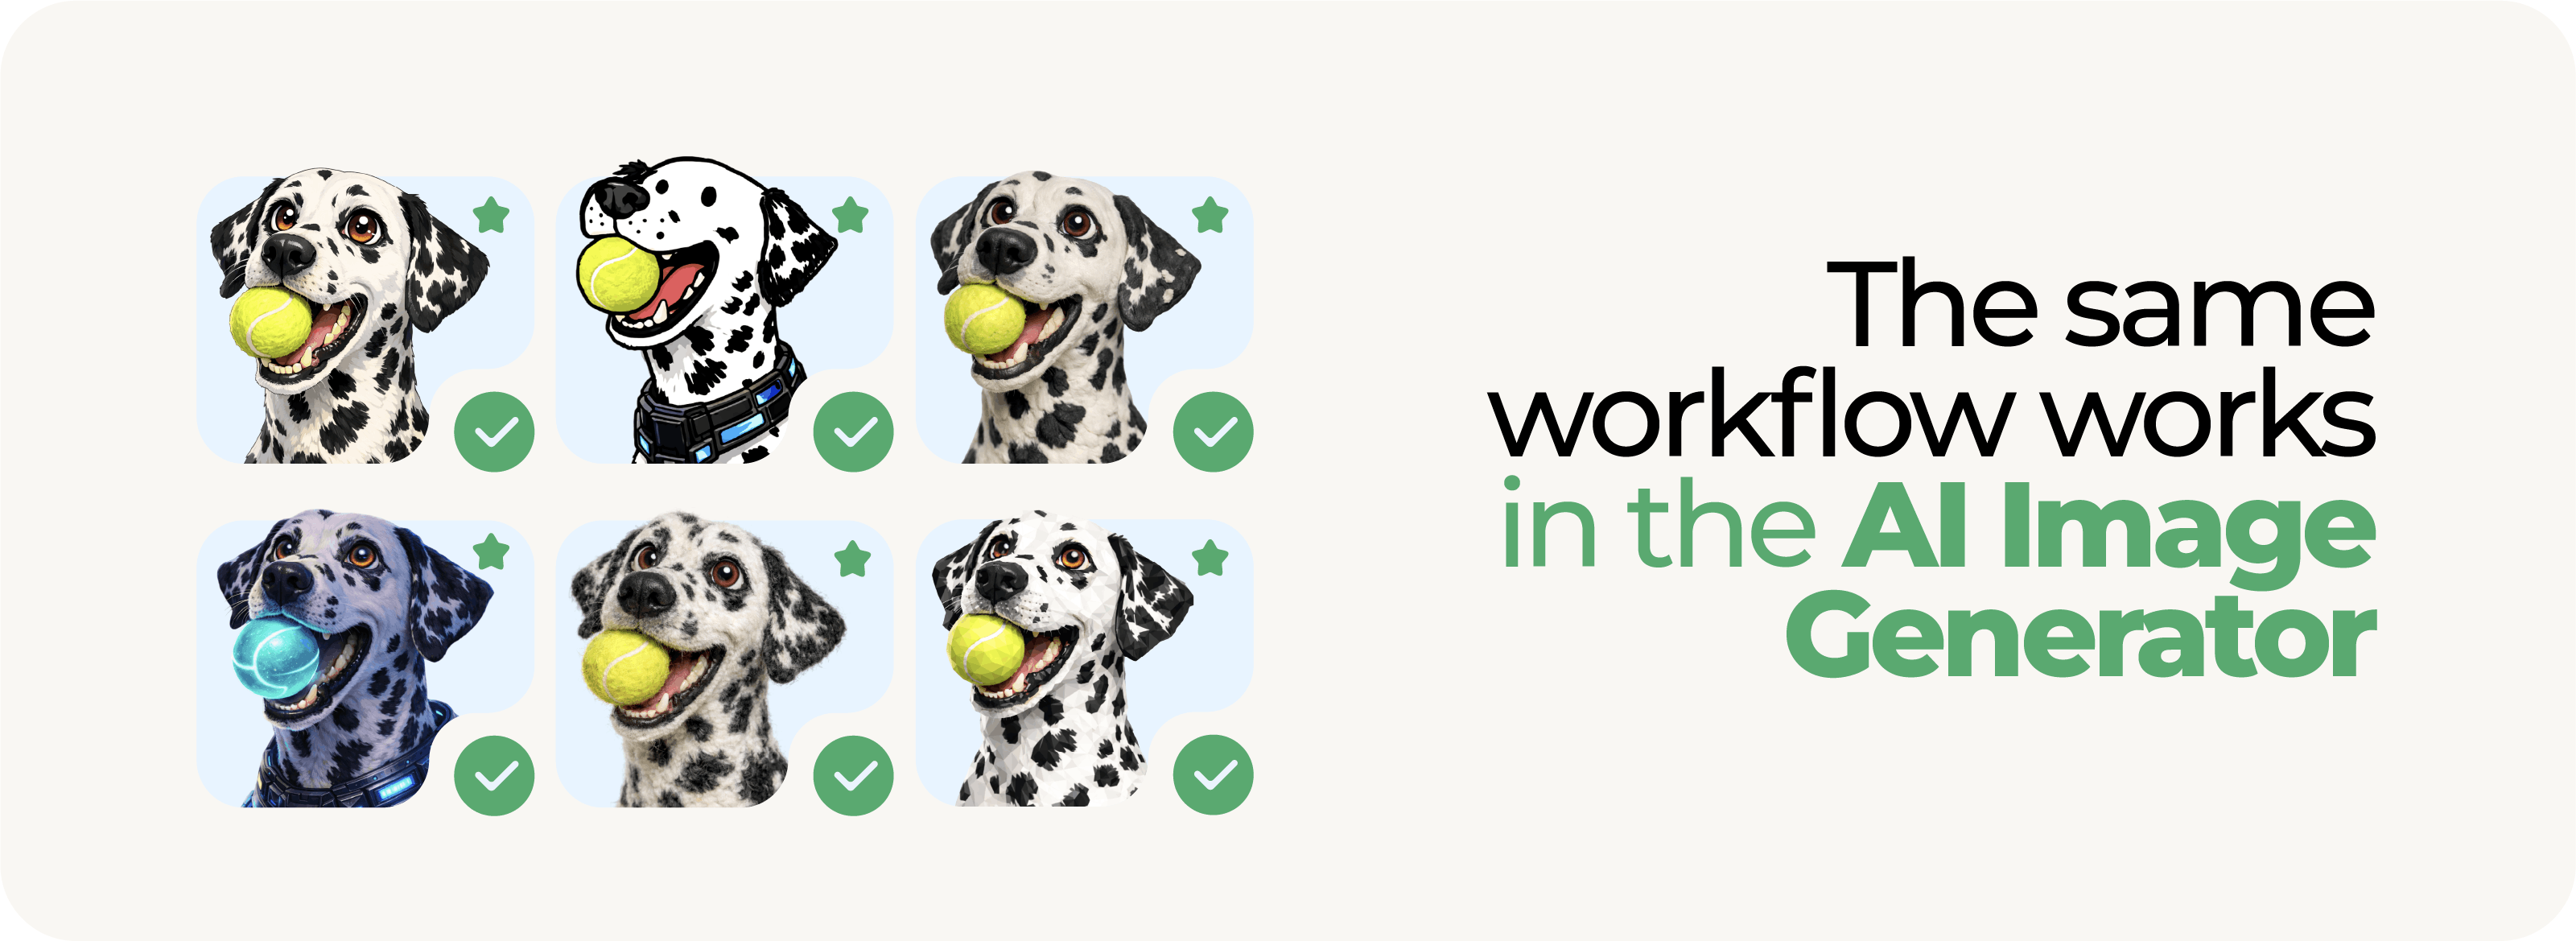
The process follows a simple, visual-first flow that mirrors what you see in the editor.
Start by selecting a model from the dropdown. This determines how the image will be generated and styled.
In the Describe your image field, explain what you want to generate. Focus on the subject, mood, and overall idea.
You can describe:
Choose your preferred size. This controls the format and proportions of the final image.
Click Style → Select to open the style picker. Choose the visual style you want the image to follow, such as Trendy Vector, Digital Art, Anime, Low-poly, Photorealistic, and more.
This style becomes the main visual rule for the final result.
Upload up to three reference images to guide the AI. Reference images help preserve:
This is especially useful when accuracy or consistency matters.
Click Generate to create your image. If the result isn’t quite right, you can Modify the image by refining the prompt or changing the style – without starting from scratch.
You can also Animate the image after it’s generated.
Once your result is ready, click Animate to turn the still image into a short motion clip. This makes it easy to go from AI Image → AI Video in one seamless step, without re-uploading or starting over.
The biggest advantage of Reference Image Restyle is how easy it makes AI video and AI image creation . If the first result isn’t quite right, you can quickly adjust the style or refine your prompt without rebuilding the project.

Try Reference Image Restyle in Renderforest’s AI Video Generator – and in the AI Image Generator – and see how many different looks you can create from the same reference image.
Share this
Article by: Renderforest Staff
Dive into our Forestblog of exclusive interviews, handy tutorials and interesting articles published every week!
Read all posts by Renderforest Staff