
Animation Tips
Want to upscale your event websites with a brand new Event RSVP tool?
From now on, you can make your event organization even more convenient and sophisticated with the following opportunities unlocked for you.
Event RSVP is a brand-new event tool in our website-builder designed to refine user experience with event and invitation websites. So, you’ll be able to use it while creating your website in Renderforest.

The first step of creating an Event is to add an RSVP component. There are ready-made RSVP components depending on the event you are hosting – for example, a cocktail party or professional conference. Choose the one you like the most and click on the “+Add” button.

Now, when you have chosen an RSVP component, you can set up and customize your event. To do this, just click either the “Event” tab on the left sidebar of the editor or the “Manage Event” controls on your RSVP component.

The event details’ structure is fixed and organized in a tidy way to suit your needs. Regardless of the event type you are hosting, the pre-set structure will look professional and trustworthy for your guests.
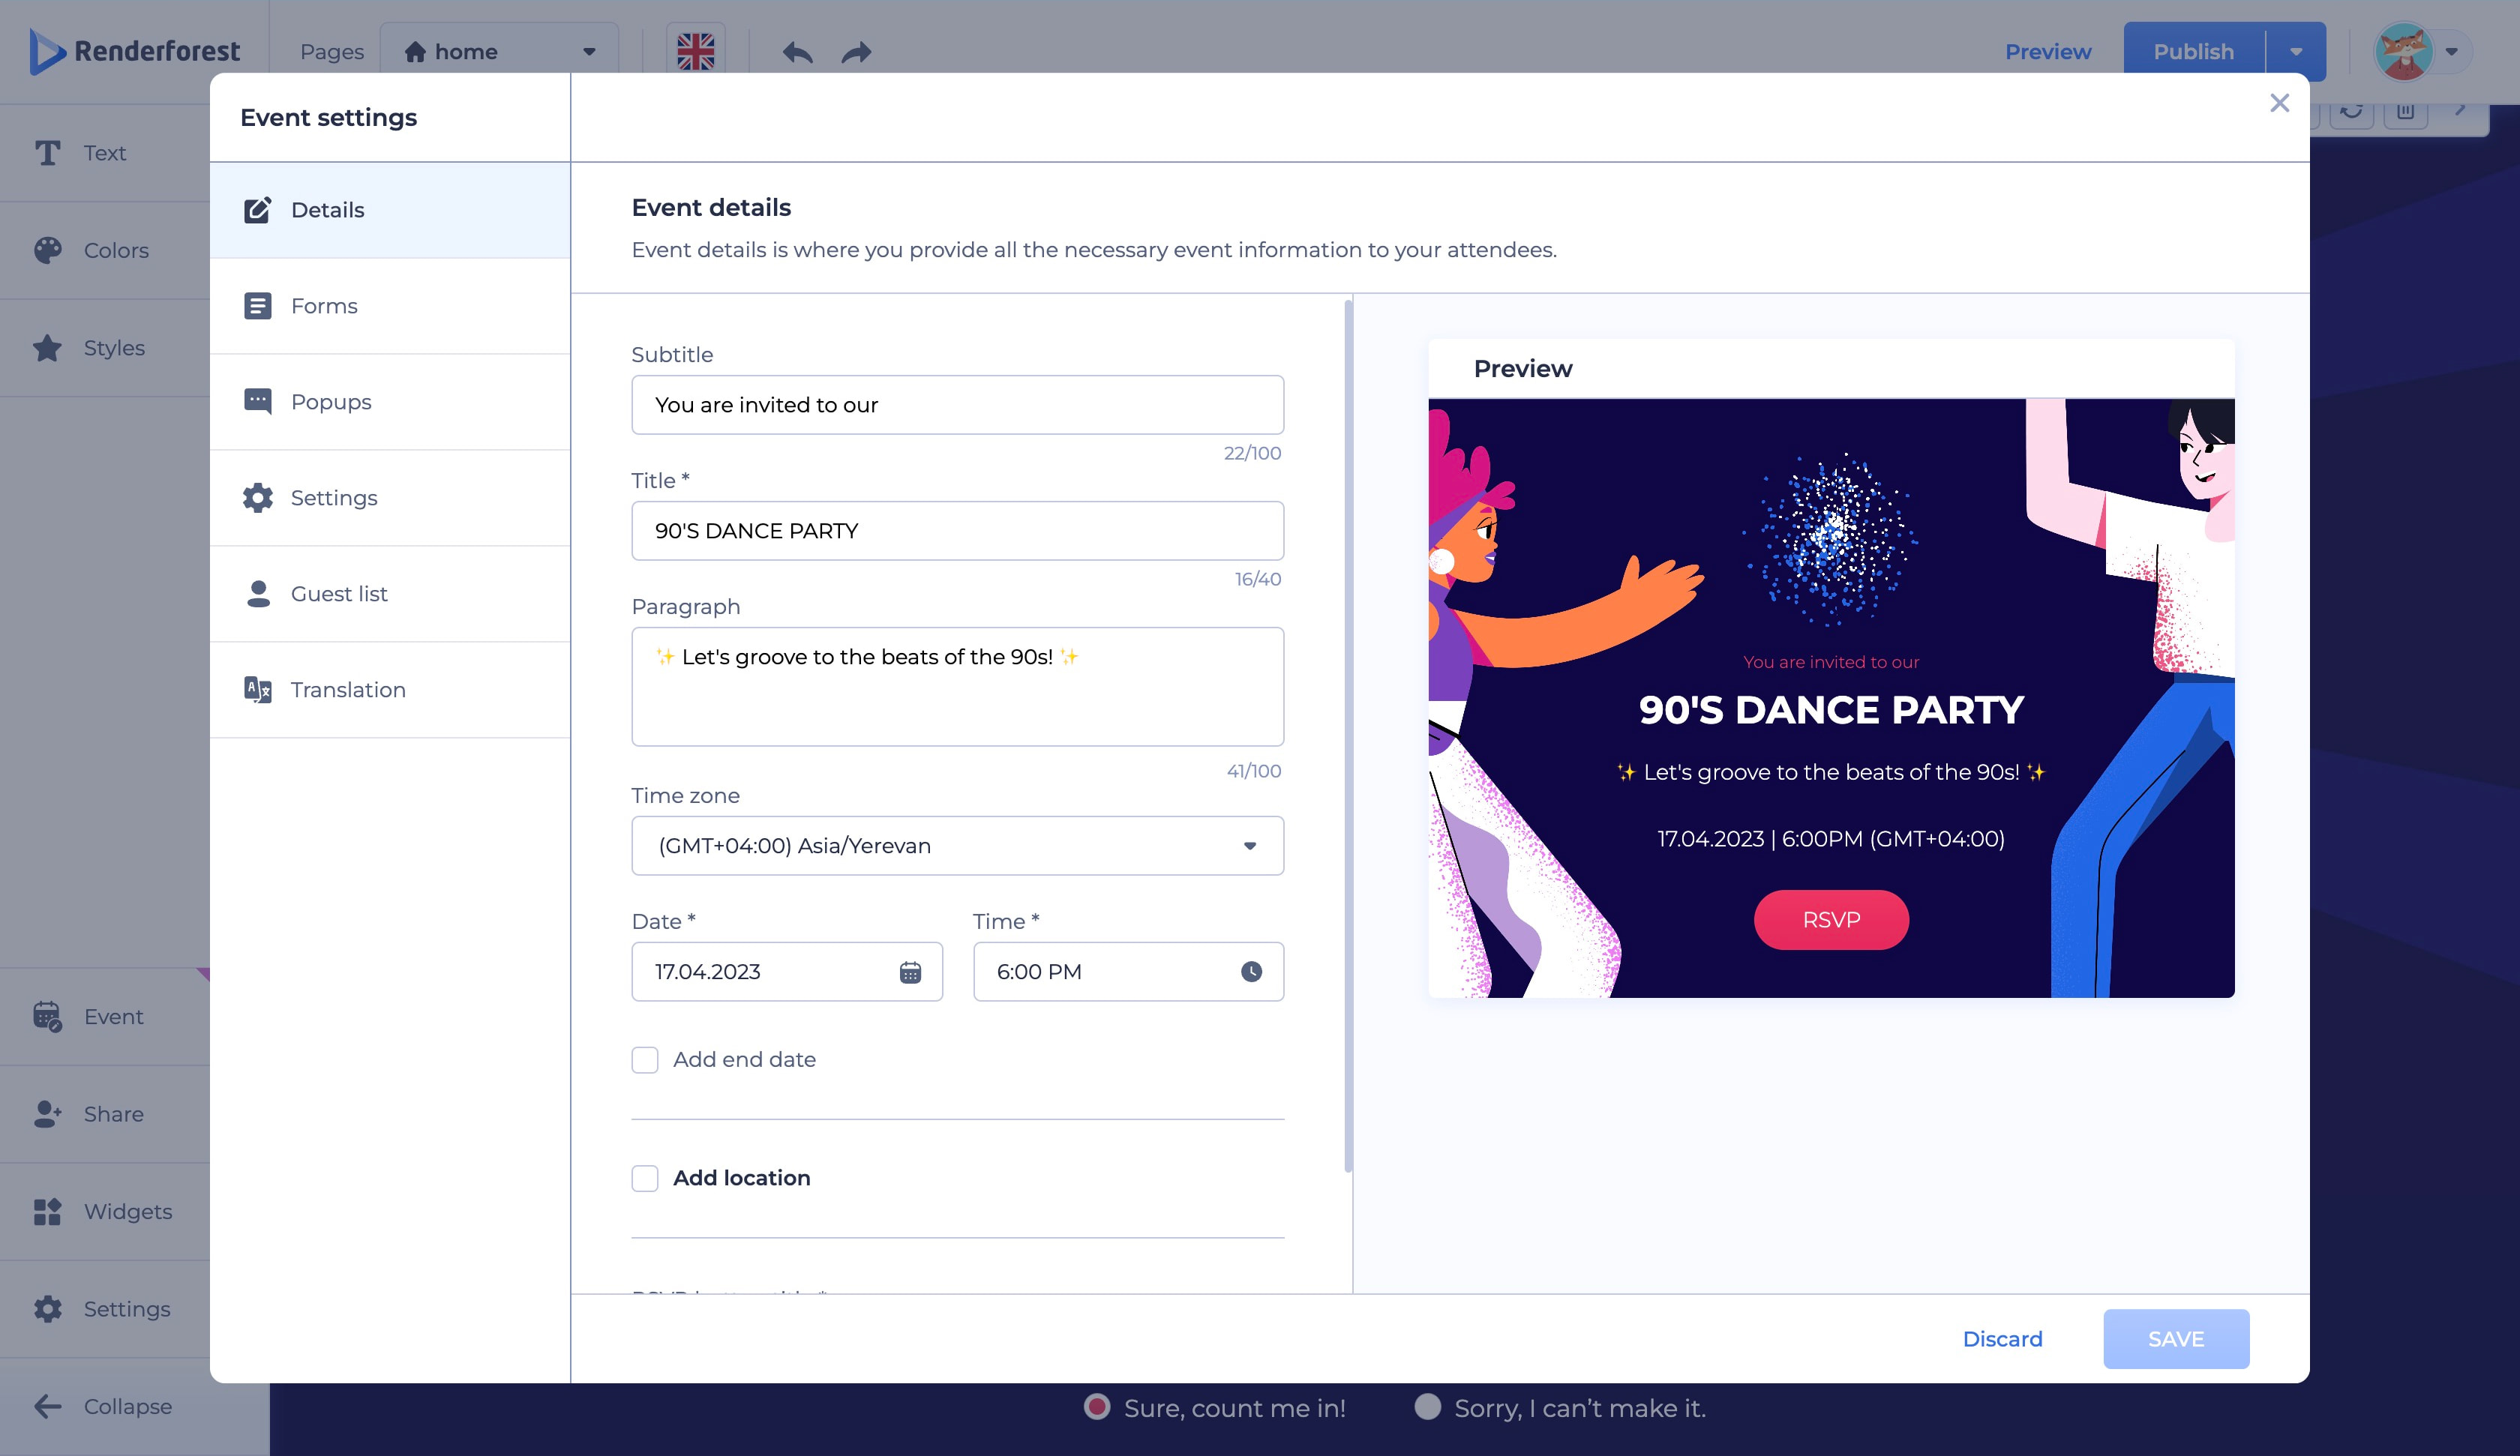
The key editable sections you can play with include the following.
Any change made in the tabs will be instantly shown in the preview section on the right, so you can ensure all the details look exactly as you’d like.
Renderforest’s ready-made forms contain all the key data you want to collect from your guests, such as attendance confirmation and contact data.
Apart from contact data, you can collect additional information by ticking the checkbox next to “Additional questions”. You can choose between various question types depending on the information you want to collect.
Text input: These questions are more suitable for open-ended answers, allowing your guests to provide detailed information to you. For example, you can ask your guest to provide information on food allergies or other special needs.
Checkbox: With checkboxes, you can provide your guests with multiple options to choose from. For example, you might ask invitees to select which activities they plan to attend from the planned list.
Radio button: Using radio buttons, you can ask your guests to choose one of the options, such as whether they want to attend just the main event or some of the after-event activities.

You can also enable your guests to bring additional guests with them. To do that, tick the “Additional Guests” checkbox in the RSVP Forms editor and allow your guests to add their +1s or more guests.
Prepare the “Thank you!” or “Sorry, we’ll not see you this time” messages for the invitees who will submit the RSVP answers. You can do that in the Popups tab of your editor, customizing separate popup windows depending on the guest’s answer to the RSVP.
Lastly, choose what you want to say when your registration is closed. It can be a friendly goodbye message or something more formal, like “We’re sorry, registration for this event is now closed.”

You can manage the event settings in the “Settings” tab to adapt your Event RSVP to your needs.
Firstly, you can set the registration status from this tab, deciding whether you’d like to keep it open for more guests to join or close it.
Additionally, you can enable email notifications every time a new guest registers for your event. This will help you keep track of the number of participants even if you are not logged in to your account or can’t access the guest list at the moment.
Finally, you can set the registration limit for the RSVP responses you want to get for the event. This allows you to specify the maximum number of guests who will be able to register for your event so that you can plan it better.
Check Renderforest plans to choose the one that best suits your event size and the number of invited guests.
The data about registered can be found in the “Guest list” tab, where all the details collected with RSVPs are displayed in appropriate columns.
The guest list provides you with the following data.
By clicking on each guest line, you can see more detailed information submitted by them in the RSVP. The additional data may include additional guests or any other custom questions you have included initially.
You can also edit your guest list manually by adding or removing guests from the list if needed. This will help you keep track of all your attendees and ensure that nobody is accidentally skipped or forgotten!

Lastly, you can export the guest list in .CSV format to use it for further targeting, such as sending them emails or social media messages.

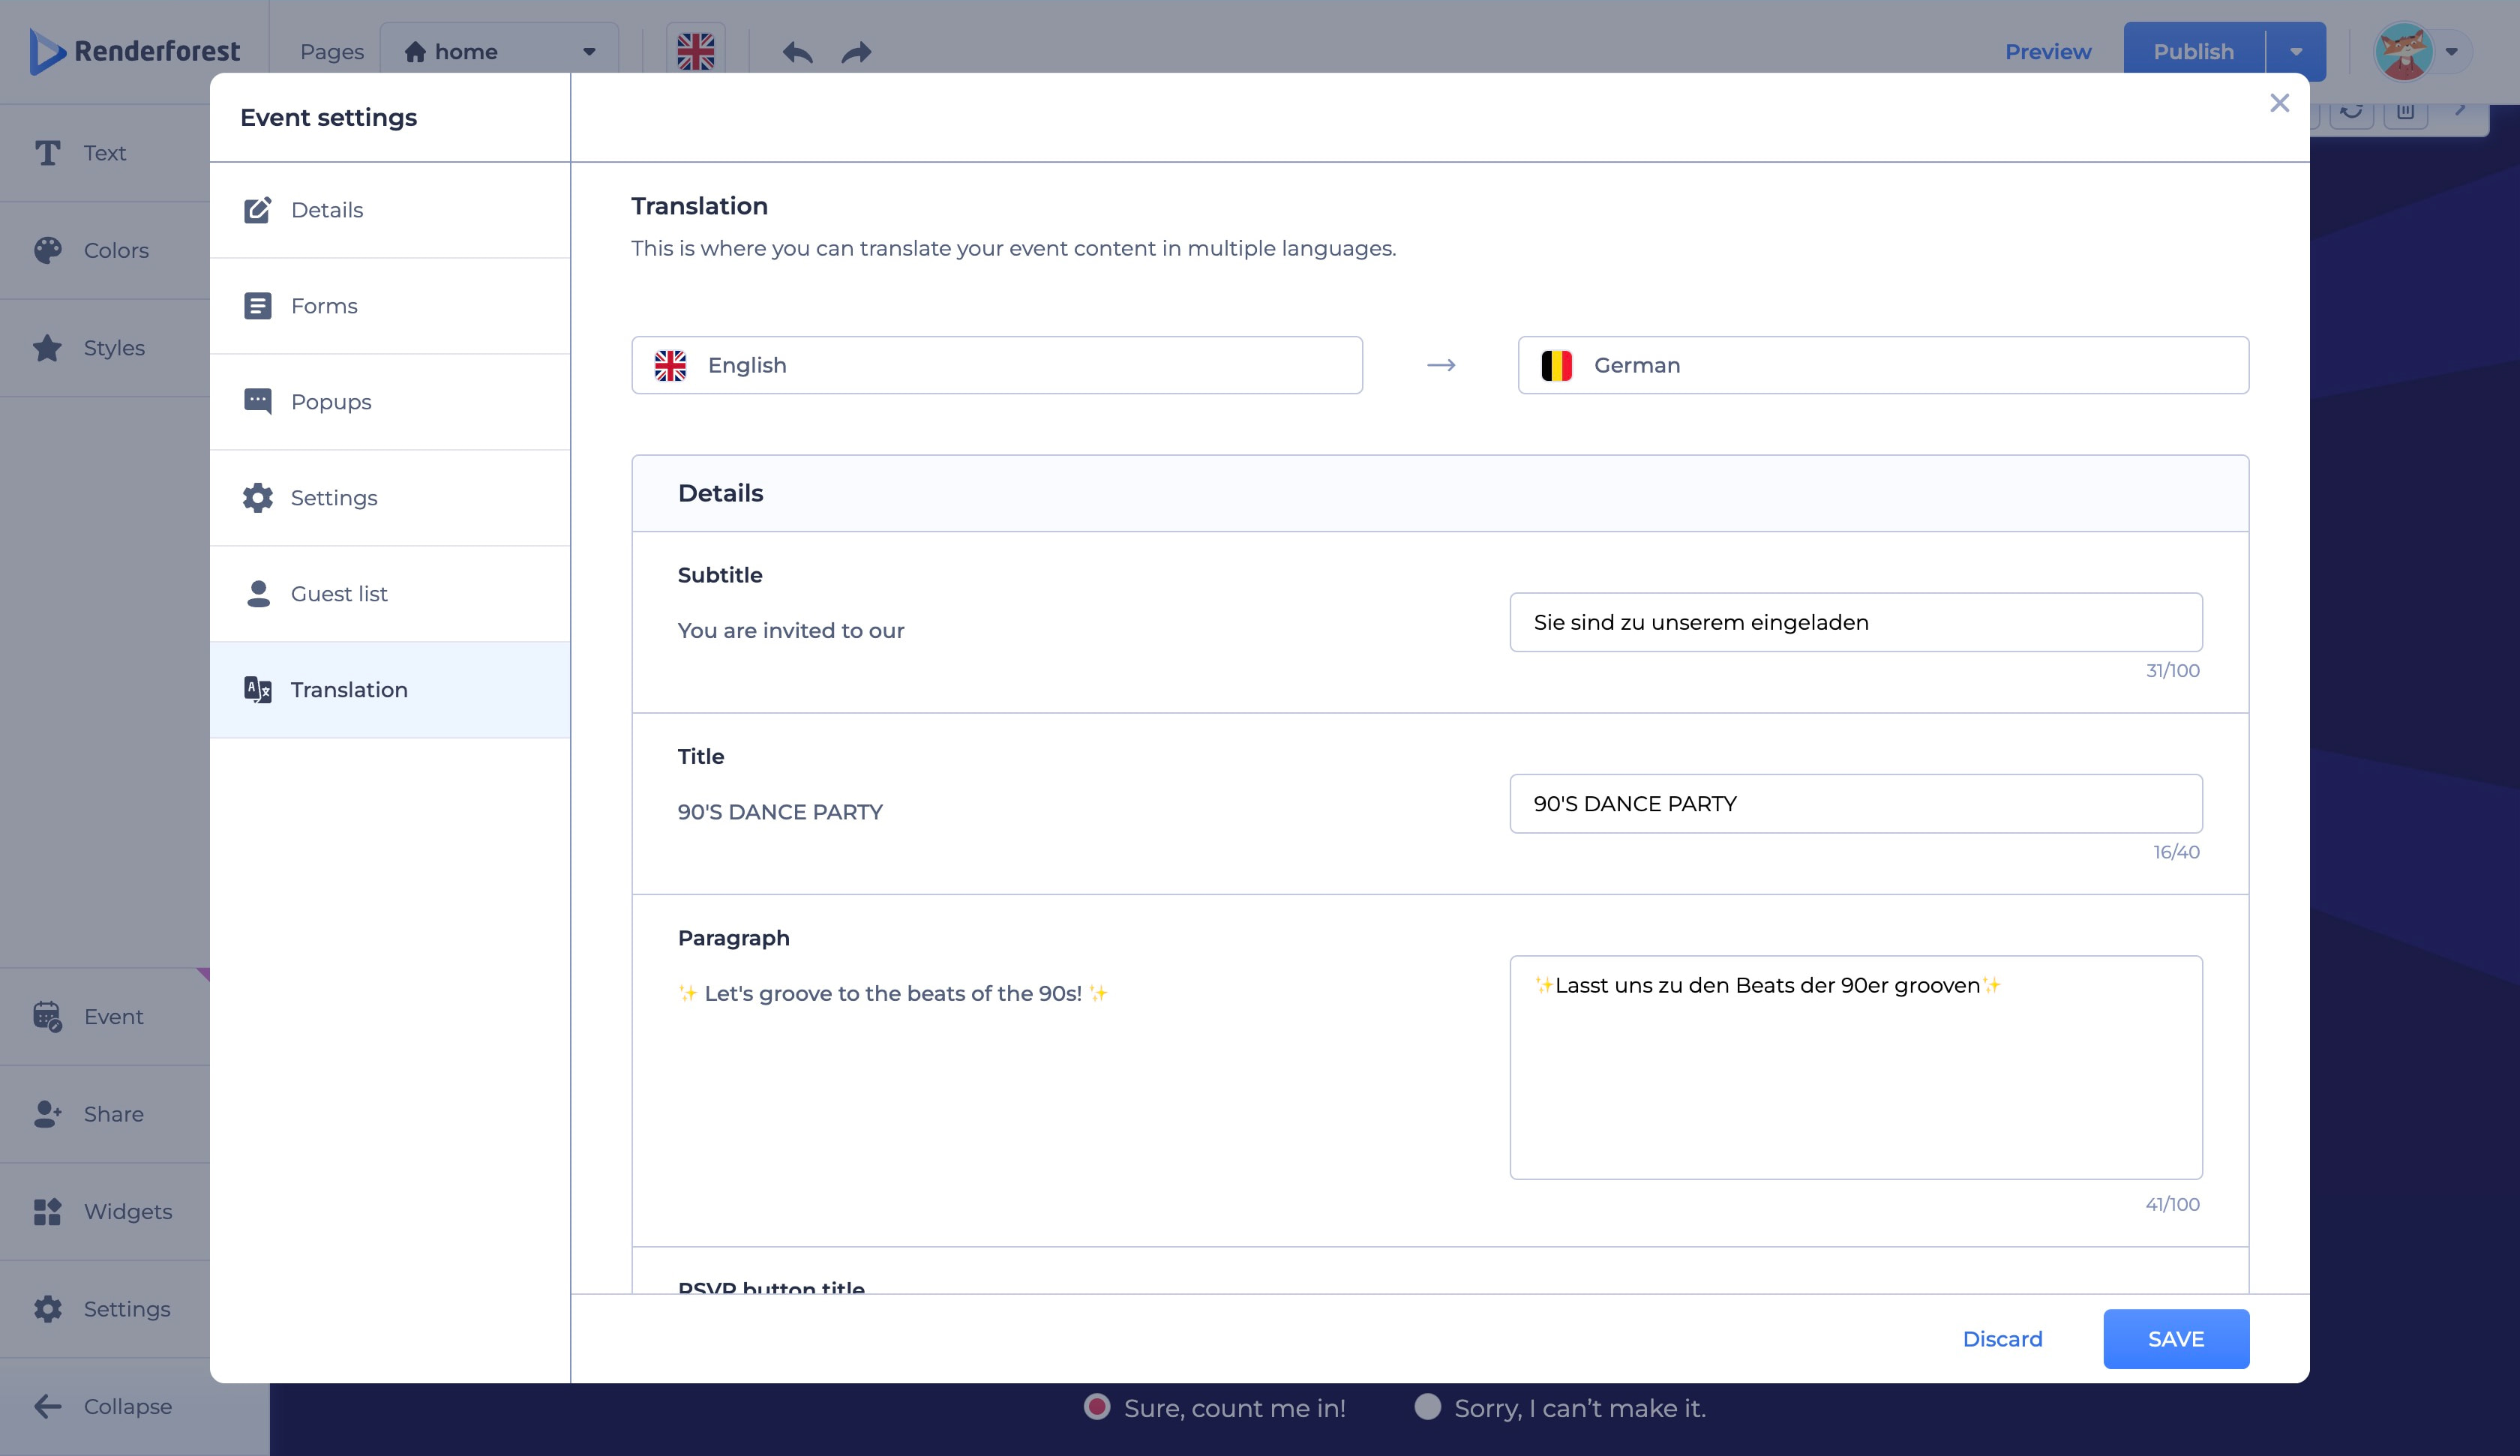
If you have a multilingual website and want to customize your Event RSVPs according to your website languages, you can do that too!
Head to the “Translation” tab where the “Translate to” section will display the languages of your website that you can select as the translation language.
This way, all your international guests can easily understand and fill out your RSVP form, ensuring smooth communication and event organization. The “Guest List” tab will show you which language your guests used to fill out the form so you can have better information about your attendees.
We are happy to include this unique feature in the RSVP market in the era of international and remote events, where guests come from different parts of the world.
As the last step, hit “Publish” to launch your website so your Event RSVP can be accessed by your guests. All that’s left for you is to watch how your event grows and the number of your guests increases.
The Event RSVP is available to all our free and subscribed users. Would you like to try it now?
Share this
Article by: Renderforest Staff
Dive into our Forestblog of exclusive interviews, handy tutorials and interesting articles published every week!
Read all posts by Renderforest Staff