AI
As an aspiring professional in any field, you try your whole bag of tricks to reach more clients and have better career opportunities. So what’s your best shot at doing that?
A regularly updated LinkedIn profile and an attractive resume are the basics. But what about creating your portfolio website that will be easily discoverable by any employer? With your professional corner in the digital world – added the proper SEO and a great design, you can act proactive and make employers find you instead of the other way around.
If you don’t have your portfolio website yet, it’s probably you think it sounds like a lot of effort; you need to work on the design, then code it, then figure out the hosting and other tech stuff.
Buuut… there is a whole new way to do it!
You can build your portfolio website with Renderforest without coding, design skills, or any other advanced technical knowledge needed.
How?
Scroll down for the easy, step-by-step tutorial to build your own portfolio website with our premade templates (and not only).
You’re at Renderforest – a simplified website builder that allows you to create functional websites and landing pages from your browser without UI/UX knowledge and coding skills.
We have an extensive library of website templates designed for various purposes and suitable for any style. These templates are premade design skeletons that you can easily customize with your own content – text, photos, videos and other media. Next, why not use a video portfolio template to create a video portfolio for your website?
So, instead of spending hours and days on website design, coding and tech stuff – you can just browse our library of templates and select the one that fits your needs.
(The good news is that our team adds new design templates every day, so there is a 99.9% probability that you will find what you’re looking for).
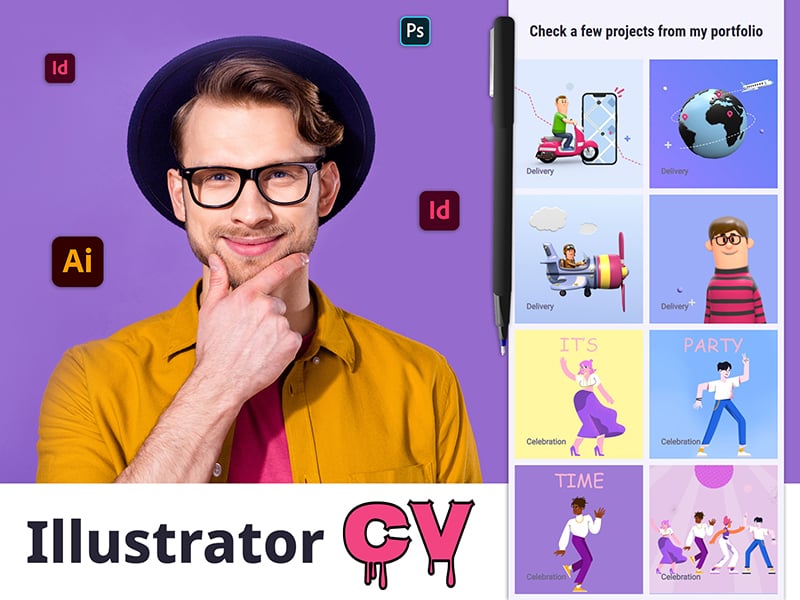
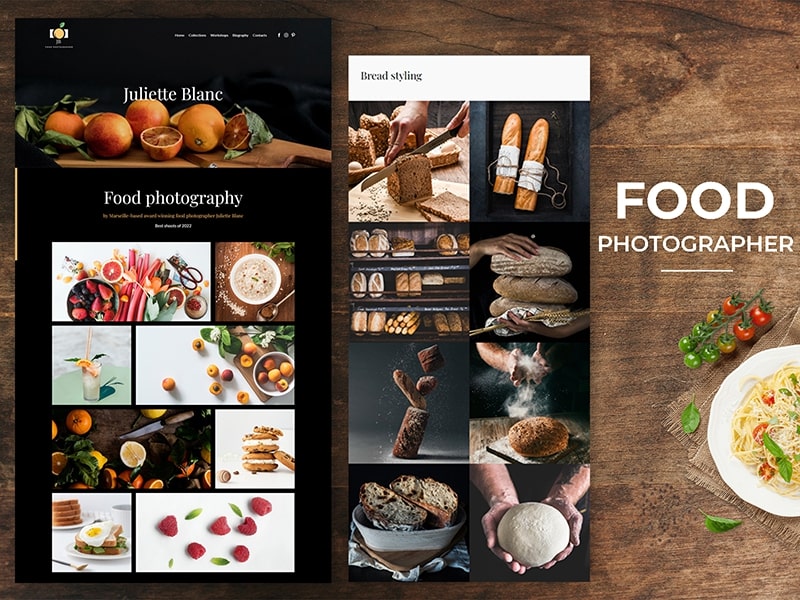
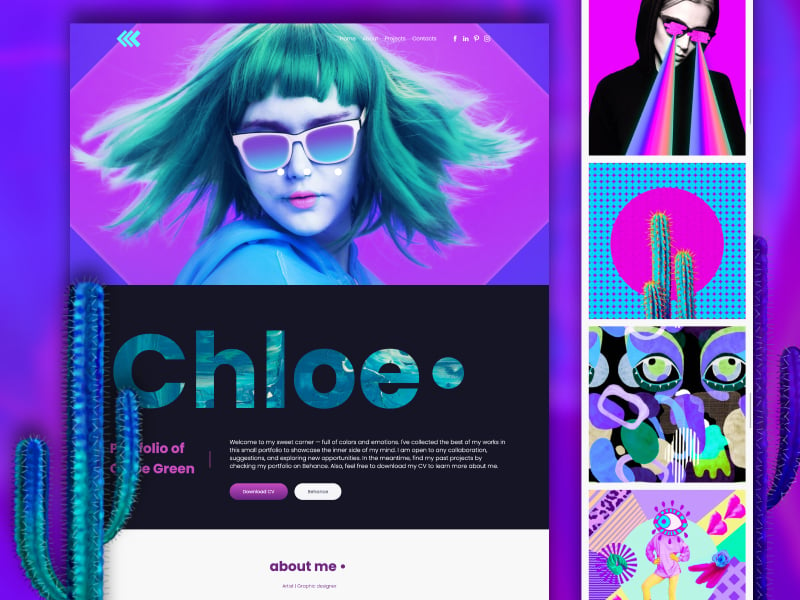
For example, here are some of our portfolio website templates you can use.
 |
 |
 |
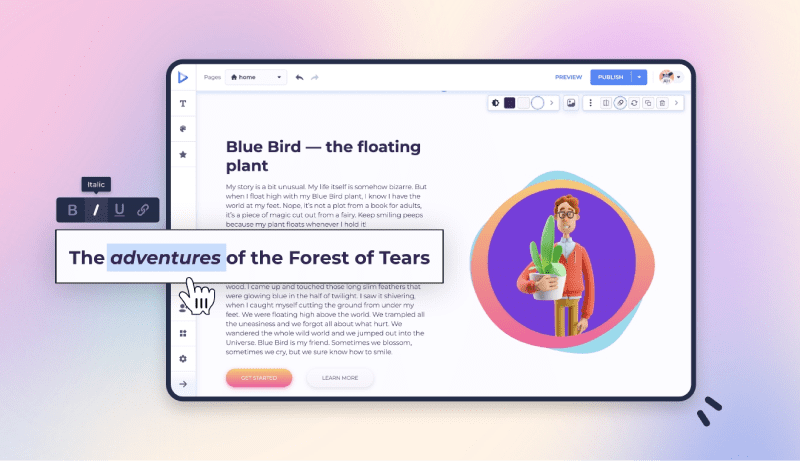
You can preview it to ensure the general layout and design meet your requirements, and if yes, you can easily edit it with your own content and media.

You can play with colors, text and styles.
Moreover, you can move sections, select light or dark modes, switch from static pages to slides and more.
Once you finish editing, press the “Publish” button and voilà – your portfolio website is out there for everyone to see!
Is it what you’ve been looking for? Even better?
Then, let’s proceed to a detailed breakdown of the steps for creating your portfolio website.
Here are the portfolio website templates you can use based on your profession. Whether you’re a designer, photographer, illustrator or other professional, you can find a relevant option.
With the “Preview” button, you can explore the design of each template in more detail. And with the “Edit” functionality on the upper right corner of each template, you can instantly access the website editor.
There are two main ways to create a website project on Renderforest.
Option 1: You can start from scratch by adding the desired components one by one. To do that, click the “+Component” button and choose the key website components you want to add. You can select the text, call to action, videos, FAQ, contact, and more.

Option 2: Refer to the preset templates that have been designed by the team of designers with specific themes. The templates for specific professions are already designed with the profession’s specifics in mind (the templates already contain the key sections you will most probably need in your portfolio website as a professional).

So, as a first step, define your portfolio website’s general layout and design. When done with this initial stage, proceed with Renderforest’s customization tools to make your websute fully yours!

Renderforest’s templates are completely editable, meaning everything is customizable, from the text and visuals to the components you add. Here is the flow we recommend you follow while editing the template.
Decide which pages your portfolio website should include and which sections should be on each. Start with finalizing the website’s skeleton and then customize each page.


Note! Anytime you add a new page to your website, do not forget to add metadata – a crucial detail that will help you make your website more user-friendly and easily discoverable by search engines and potential clients.

Here is a detailed guide on metadata in case you want to explore more.
The general rule of thumb suggests using san-serif fonts for your portfolio website, avoiding large font sizes while not compromising how easy it is to read the text. Regarding colors, some neutral ones like gray, black, dark blue, and similar are usually considered more professional than bright or neon shadows.
The left-side menu in the editing dashboard offers you all the needed elements to customize your presentation’s font, colors, and general style. Click on each subsection to play with the visual appeal of your website.
Well, now it’s time to add your unique content to the template.
Upload relevant images and videos from your computer and write compelling texts explaining your work and portraying you as a professional.
Critically avoid overcrowding the page with too many images and texts, as it can make your portfolio look untidy. You can also consider hiring a content writer to create texts for your portfolio website or to edit the existing ones so that you have a perfectly polished copy on your page.
Once the text and visual elements are final, upload them to your portfolio website template by clicking on the corresponding items. When adding texts, the word count suggestions below each textbox will help you identify whether the texts are too brief or lengthy.
Provide your potential clients with quick options to contact you, follow you on social media, and stay updated about your activities. To do so, you will need to add widgets like contact forms and social media buttons.

Choose widgets from the left side panel and add your social media contacts or live chat to your portfolio website in a few clicks.
Whenever you need your teammates to participate in the website creation process, just invite them to join you in working on your portfolio website. This could be a professional designer to consult you on your website’s design, a content writer to create texts for you, or anyone else who can help you with the creative task. Add as many collaborators as you need.

The domain name is the address of your website – the URL your potential clients will have to put on the search bar to land on your page.
There are two main ways to choose a domain name for your portfolio website.
OK, so which one to choose?
If you don’t have a well-established personal brand, e.g., you don’t have a specific logo or brand name – Renderforest’s subdomain option can be a good fit for you. You’ll save money and get free of technical hassles like registering your custom domain in the domain directory, setting up the DNS record, etc.
To use this free option, head to Settings and then to the Domain section inside your chosen template’s editing dashboard. Edit your free subdomain and press Save to finalize the changes.
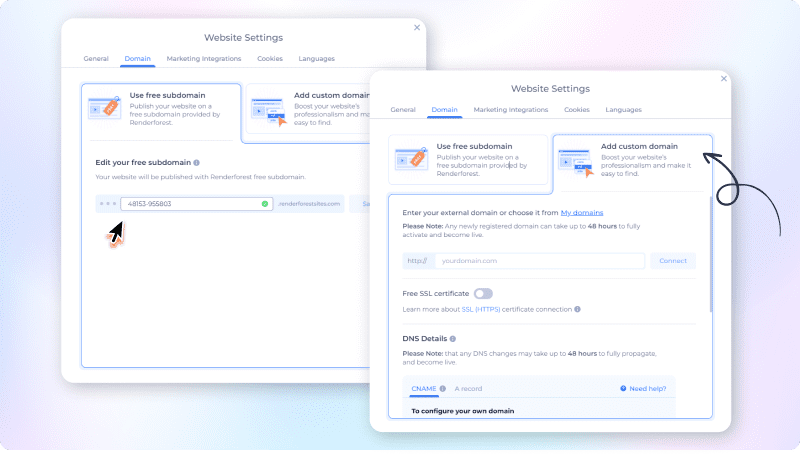
If you prefer a custom domain name, either head to a professional platform for buying domain names called domain registrars or buy it through Renderforest. In the domain search box, see if your website name is available and its price.
If you already have a custom domain, connect it using the Renderforest DNS system.
In case you go for the custom domain option, here is a guide on choosing a memorable domain name for portfolio websites.
A hosting platform is a place where you store your website’s content. In other words, it’s a server where all your website files are located and thanks to which people can access your website.
You need to care for a hosting platform only if you add a custom domain because the hosting is included with Renderforest’s free subdomain option.
If you choose a custom domain, you can buy a hosting and domain name from the same company or the domain name from one provider and the hosting service from another. It’s up to you.
Note: Many domain registrars automatically include hosting services when you buy a domain. So, do thorough research to identify which platform offers the best hosting service at the most reasonable price.
Read Forbes’s overview of 2023’s best hosting providers.
If you want a static website that will be shared with a potential client only when requested, you can skip this step.
But if you want to promote and share your work with a wider audience, it’s time to think about tools for marketing automation like analytics, SEO, and others that will help your website to become discoverable.
Renderforest’s free package lets you connect your portfolio website to the SEMrush keyword tool. With this, you can easily analyze which keywords are used to search for your services and optimize your website content accordingly.
To add this, head to Settings and choose Marketing Integrations from the menu.

If you will also promote your services through Facebook, add Facebook Pixel to collect and track data from your Facebook ads.
For more advanced analytics of your website’s performance, you can connect Google Analytics, Google AdSense and Google Tag Manager in the Renderforest’s upgraded plan.

You can add PayPal integration if you want to sell products or services with your portfolio website directly. This will enable customers to pay via credit or debit cards without leaving your website.
To do that:
With these simple actions, you can freely accept payments from your customers and make it easier for them to purchase your services.
You can access PayPal integration from the Components menu on the Settings page.
You can customize the texts of your website to any language you need. If you want to go beyond the local language and make your website accessible to people all around the world (or at least your target nationalities), you can choose an option for a multilingual website.
This feature is available for the premium package, and it allows you to create multiple versions of your website for different languages.
To set up a multilingual website with Renderforest, go to the Settings > Language menu and choose the language you want to add.

Even if your website is not live yet, you can take a sneak peek at how it will look when published. To do this, click the Preview button from the top panel.
In the preview mode, you can view your website from a desktop and check how it looks on different devices and browsers. Additionally, you can interact with buttons and navigate between different pages and sections to test the user experience.
When you’re ready to publicize your website, click the Publish button. After that, Renderforest will provide you with the unique URL for your portfolio website so you can share it with potential clients.
Da-Dam! Congratulations! You have just created a professional one-page portfolio website with Renderforest!
A good online presence is essential for almost any professional in today’s world. A portfolio website makes it easier to showcase your work and services while making a good first impression with potential clients or employers.
And while it used to be a complicated and expensive process to build a website, Renderforest’s portfolio website builder is an easy and affordable way to create your professional-looking portfolio website.
With its intuitive drag-and-drop editor, free content library and well-designed templates, Renderforest allows anyone to get their online presence up in no time.
So, don’t wait any longer! Create your portfolio website with Renderforest today and start attracting new customers!
Need a more detailed consultation from our support team? Refer to our help section to get the assistance you need.
Recommended Reading
Share this
Article by: Renderforest Staff
Dive into our Forestblog of exclusive interviews, handy tutorials and interesting articles published every week!
Read all posts by Renderforest Staff