AI
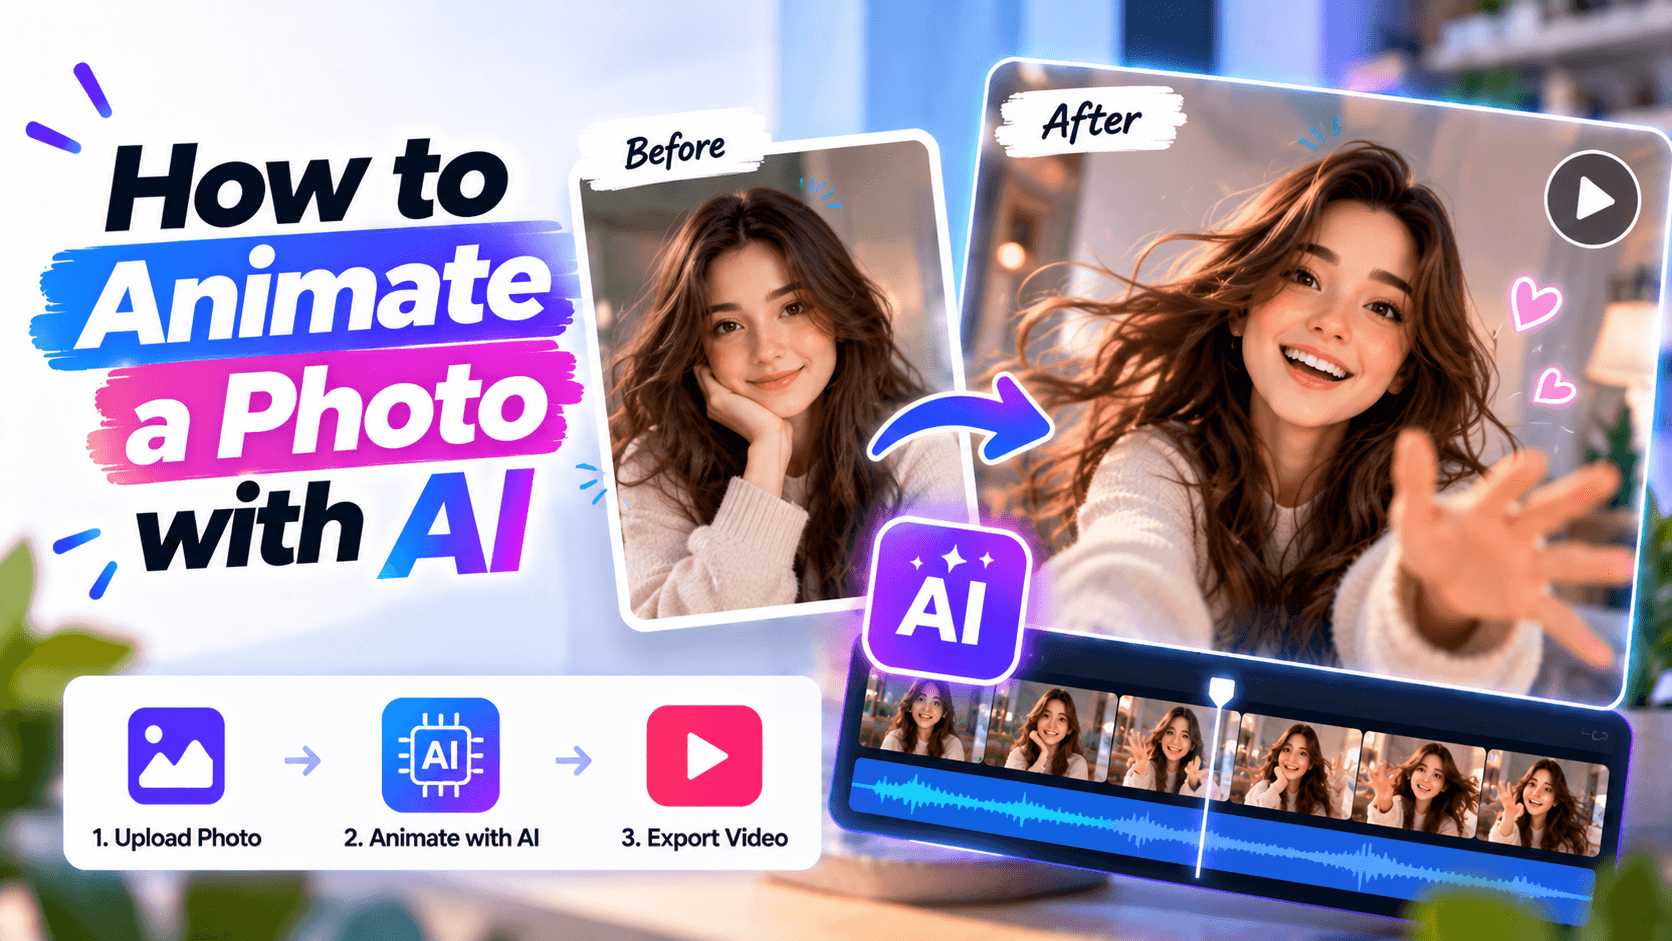
You can animate a photo with AI by uploading a still image to an image-to-video tool, describing the motion you want, generating a short clip, and editing the result for the right format, platform, and use case.
The hard part is not making the photo move. The hard part is making it move without ruining the face, logo, product label, text, room, or brand style.
This guide shows you how to animate a photo with AI in a way that looks intentional, not random. You will learn how to choose the right image, write better prompts, control the motion, fix common AI mistakes, and export a video that is actually usable.
To animate a photo with AI, use this workflow:
Renderforest’s Image to Video AI is one way to turn static visuals into motion videos with transitions, depth, and movement. Renderforest’s help center also explains that users can upload still images under the reference images section and describe the desired motion in the prompt box. Source: Renderforest Image to Video AI and Renderforest Help Center.
AI photo animation does not simply “move” a photo. It generates new frames based on the original image and your prompt. That means the tool has to predict what the subject, background, lighting, and camera might do next.
That is why AI can create beautiful motion, but it can also redraw details you wanted to preserve.
The goal is not just to add motion. The goal is to add motion while protecting the parts of the photo that matter.
For business content, this matters even more. A product teaser is useless if the label bends. A founder portrait is risky if the face changes. A real estate clip feels untrustworthy if the room geometry warps.
Your source photo matters more than your prompt. A strong image gives the AI less to guess.
Use a photo that has:
Avoid photos where the AI has to invent too much.
The safest image is one where the subject is already strong. AI should add movement, not rescue a weak photo.
Before opening an AI tool, choose the type of motion you want. This is where most bad outputs start. People ask for “cinematic movement” without knowing what should actually move.
There are four useful types of AI photo animation.
For most commercial content, camera motion is the safest. The subject stays mostly unchanged while the scene feels more alive.
For creator content, subject motion can work well, but it carries more risk. Faces, hands, teeth, and eyes are common failure points.
For product marketing, use this rule:
The product should usually stay stable. The camera, lighting, or background should move.
Not all motion has the same risk. Use this simple framework before writing your prompt.
For business content, start with safe motion. For social content, test moderate motion. Use risky motion only when accuracy matters less than entertainment.
A subtle product push-in often looks more professional than a dramatic AI transformation.
Do not animate first and think about format later. A vertical Reel and a website hero need different framing, pacing, and motion.
If the final video is vertical, give the AI room around the subject. If the image is tightly cropped, the animation may cut off important details.
Open your AI image-to-video tool and upload the photo.
In Renderforest, the image-to-video workflow lets users upload still images and turn them into short dynamic video clips. The help center says to choose the AI Video Editor flow, upload images under the Reference Images section, and describe the motion in the prompt box. Source: Renderforest Help Center.
Some workflows also let you upload multiple reference images, such as a logo, product, or character, to guide the video. Renderforest’s help center notes that users can upload several images in the AI Video tab’s Reference Images upload section. Source: Renderforest Help Center: Add images to AI video.
A good AI photo animation prompt has five parts:
Use this formula:
Animate this photo into a [length] video for [platform/use case]. Keep [important details] unchanged. Add [specific motion]. Use a [style] look. Avoid [distortion risks]. Format as [aspect ratio].
For example:
Animate this product photo into a 6-second vertical video for Instagram Reels. Keep the bottle shape, label, logo, color, and cap exactly the same. Add a slow camera push-in, soft background depth, and subtle studio light movement. Use a clean premium ecommerce style. Avoid warping the label, changing the logo, adding fake ingredients, making the product float, or adding extra objects. Format as 9:16.
The prompt should protect the image first and add motion second.
Start with a short clip. Four to eight seconds is usually enough.
Longer clips give the AI more time to drift away from the original image. Faces can change. Product labels can bend. Rooms can warp. Backgrounds can invent new objects.
Generate one short version, then check the beginning, middle, and end.
Ask:
Do not judge only while the video is playing. Pause the clip. AI artifacts often become more obvious when the frame is still.
Use this review checklist before you decide the animation is good enough.
If the clip fails one of these checks, fix the prompt before editing.
If the output is close but flawed, change one instruction at a time.
The mistake is asking the AI to “make it better.” That gives the model too much freedom. Tell it exactly what failed.
The AI-generated clip is only one part of the final video. Editing turns the animation into something useful.
For most social or marketing videos, add:
This is where a tool with editing and branding support becomes useful. Renderforest’s AI Video Generator says users can start with text, an image, or a script, choose a model, style, and format, then refine the result. Source: Renderforest AI Video Generator.
A raw animated image may look interesting. A finished video needs structure.
Export the video in the format you need. Then test it where it will appear.
A clip that looks good on desktop may fail on mobile if the subject is too small. A smooth cinematic animation may feel too slow on TikTok. A dramatic product animation may look fake in an ecommerce ad.
Use this final test:
If it does not pass these checks, the animation is not ready to publish.
Here is the practical workflow for animating a photo in Renderforest:
Renderforest’s help center says its Image-to-Video feature lets users upload still images and transform them into short dynamic video clips. It also explains that users should describe the motion in the prompt box, with examples such as camera zoom, hair movement, or background changes. Source: Renderforest Help Center.
Use Renderforest when you want the animated photo to become a finished asset, not just a raw AI clip. That makes it especially useful for product teasers, social ads, event promos, small business videos, website visuals, and branded content.
Different photos need different motion. A product photo should not move like a portrait. A logo should not move like a landscape.
Animate this product photo into a 6-second vertical video for a social ad. Keep the product shape, label, logo, packaging, color, and proportions exactly the same. Add a slow camera push-in, soft studio light movement, and subtle background depth. The product should feel premium and trustworthy. Avoid bending the label, changing text, adding fake ingredients, changing the packaging, floating, spinning, or adding extra objects. Format as 9:16.
Best motion for product photos:
Avoid:
For ecommerce, subtle usually wins.
Animate this portrait into a 5-second personal brand video. Keep the person’s identity, face, expression, hairstyle, outfit, skin tone, and background accurate. Add a subtle camera push-in, natural blinking, soft hair movement, and gentle lighting. Avoid changing facial features, teeth, eyes, mouth, hands, age, expression, or body shape. Keep the result realistic and respectful. Format as 4:5.
Portrait animation works best when the motion is small. The more the face moves, the more likely it is to drift.
Use extra caution with real people. Get permission before animating someone’s likeness, especially for ads, testimonials, client work, sensitive topics, or political content.
Portrait animation is not only a creative decision. It is a trust decision.
Animate this old photo into a respectful short video. Keep the person’s identity, clothing, facial features, age, and vintage photo style unchanged. Add gentle depth, subtle blinking, and a slow camera push-in. Preserve the original mood. Avoid changing the expression, face shape, background, clothing, age, or photo style.
Old-photo animation is popular because it can make a memory feel present again. But it needs a lighter touch. Do not turn the person into a new character. Add life without rewriting the image.
Animate this food photo into a 6-second video for a restaurant social post. Keep the dish, plate, ingredients, colors, texture, and composition accurate. Add subtle steam, soft light movement, and a slow camera push-in. Use a warm appetizing style. Avoid changing the food shape, adding ingredients, moving the plate, melting textures, or making the dish look artificial.
Food animation works best with atmosphere: steam, shine, warmth, light, and camera movement. Avoid asking the food itself to move unless the image supports it.
Animate this landscape photo into an 8-second cinematic video. Keep the location, mountains, trees, water, and composition accurate. Add slow cloud movement, gentle water motion, and a smooth camera pan. Use natural light and realistic motion. Avoid adding people, animals, buildings, vehicles, unrealistic weather, or changing the geography.
Landscapes are more forgiving than faces or products, but they can still go wrong. AI may add birds, buildings, or weather you did not ask for. Tell it what not to add.
Animate this interior photo into a 6-second real estate video. Keep the room layout, walls, furniture, windows, decor, and proportions accurate. Add a slow camera push-in and subtle sunlight movement. Use a clean premium property-tour style. Avoid bending walls, moving furniture, changing decor, adding objects, changing the view, or distorting straight lines.
Real estate animation should feel calm and trustworthy. Avoid dramatic camera moves that bend rooms or make walls look unstable.
Animate this brand graphic into a 5-second video for a social ad. Keep the logo, text, colors, layout, typography, and spacing accurate. Add subtle background motion, clean parallax, and a smooth final frame. Use a modern minimal style. Avoid changing letters, rewriting text, adding extra symbols, distorting the logo, or making the design too busy.
For text-heavy graphics, do not ask the AI to animate the text itself. Keep text static and add motion around it.
The fastest way to improve your AI animation is to stop using vague prompts.
A good prompt does not only describe movement. It sets boundaries.
You can animate photos with several AI tools. The workflow is similar: upload the image, describe the motion, generate a short clip, then edit or export.
Canva’s help center describes Image to Video as a way to bring static images to life with subtle AI-generated motion, turning photos or still graphics into short animated clips for social posts, presentations, and product visuals. Source: Canva Help Center.
CapCut’s image-to-video AI page says users can turn photos into videos for slideshows, Reels, or marketing videos with effects and voiceovers. Source: CapCut Image to Video AI.
Adobe Firefly’s help documentation says users can animate still shots and illustrations into video clips using prompts and keyframe images. Source: Adobe Firefly Help: Generate videos using images.
Runway’s product page lists text-to-video and image-to-video among its AI image and video generation tools. Source: Runway Product Page.
The tool matters, but the process matters more. A clean photo, specific prompt, and careful review will usually beat a vague prompt in a more advanced tool.
Bad prompt:
Make this photo dramatic and cinematic with lots of motion.
Better prompt:
Add a slow camera push-in, soft background depth, and subtle light movement. Keep the subject unchanged.
One strong motion idea is better than five vague effects.
The AI does not know what matters unless you tell it.
If the face, product label, logo, room, or text must stay accurate, write that into the prompt:
Keep the product label, logo, shape, and color exactly the same.
Or:
Keep the person’s identity, expression, hairstyle, and facial features unchanged.
AI video models often struggle with text. If your photo includes important text, keep it static or add the text manually after generation.
For posters, ads, logos, and infographics, use design motion around the text instead of asking the AI to animate the text itself.
A horizontal animation cropped into vertical can cut off the subject. Choose the platform first, then generate or edit for that format.
A raw animated photo is rarely the final asset. Add structure: hook, text, music, logo, CTA, and a clean ending.
Some AI videos look fine in motion but look strange when paused. Since viewers can pause, screenshot, or see a thumbnail, every major frame should hold up.
The fix is usually not a longer prompt. It is a clearer prompt.
AI photo animation is best when you want one image to feel alive. A slideshow is better when you want to tell a story with several images.
For many marketing videos, the best result combines both: animate the hero photo, then place it inside a structured video with text, music, and supporting scenes.
Before publishing, especially for commercial use, check the result like a real creative asset.
If the animation changes the product, person, claim, or setting in a way that could mislead viewers, do not publish it as a commercial asset.
AI photo animation is easy to create. That does not mean every result is safe to use.
AI can animate many types of photos, including portraits, products, landscapes, food images, pets, old photos, and brand graphics. The best results come from clear, sharp, well-lit images with one main subject and enough space around the edges.
The easiest way is to use an image-to-video AI tool, upload your photo, write a motion prompt, generate a short clip, review it for artifacts, then export it in the right format. For a more finished result, use a tool that also lets you add text, music, branding, and transitions.
Write what should move and what must stay unchanged. A good prompt includes the use case, subject protection, motion, style, restrictions, and aspect ratio.
Example:
Animate this photo into a 6-second vertical video. Keep the subject unchanged. Add a slow camera push-in, soft background depth, and subtle light movement. Avoid warping, extra objects, or changing the face. Format as 9:16.
Upload the old photo to an image-to-video tool and use a gentle prompt. Ask for subtle depth, blinking, or camera movement while preserving the person’s identity, clothing, expression, and original style. Avoid big smiles, modern effects, or background changes unless restoration is the goal.
Yes, but keep the movement subtle. Ask the AI to preserve the product shape, label, logo, packaging, color, and proportions. Use camera movement, light movement, or background depth instead of making the product itself move too much.
AI video tools generate new frames from the original image. If the prompt asks for too much subject movement, the model may redraw faces, hands, text, or logos incorrectly. Reduce subject motion and tell the AI exactly what must stay unchanged.
Most AI photo animations work best at 4–8 seconds. Short clips reduce the chance of distortion and are easier to use in Reels, Shorts, ads, websites, and presentations.
You can, but check the source photo rights, tool license, commercial-use rules, watermark, product accuracy, and likeness permissions first. For paid campaigns, review the result like any other brand asset.
The best photos are sharp, well-lit, and simple. One clear subject, clean background, and visible edges help the AI create better motion. Low-resolution, cluttered, cropped, or text-heavy images are harder to animate cleanly.
They are closely related. AI photo animation usually means adding motion to a still image. Image-to-video AI is the broader category of tools that turn images into short video clips using prompts, camera movement, and generative motion.
Animating a photo with AI is simple. Making the result usable takes judgment.
Start with a clean image. Choose one motion idea. Protect the parts of the photo that must stay accurate. Generate a short version. Review it carefully. Then edit the clip into the format, pacing, and brand style you need.
For most business and creator use cases, the best AI photo animation is not the one with the most movement. It is the one that makes the original photo feel alive without breaking trust.
Share this


Article by: Liana Ziroyan
Liana is a marketing professional with 11 years of experience in digital marketing, content, and product communication. She has a strong eye for visual storytelling and loves turning ideas into engaging campaigns that connect with audiences. With her experience across branding, creative content, and user-focused messaging, Liana enjoys finding simple, effective ways to make products feel clear, useful, and exciting.
Read all posts by Liana Ziroyan