Video Editing
Ready to turn your text into natural-sounding speech?
We’re happy to announce that one of your long-awaited features is live!
Use our text-to-speech AI feature to add a voiceover to your videos using the desktop video editor, or our iOS and Android apps.
If you have already seen our advanced voiceover trimmer, then you know that you can easily sync your voiceover with every selected scene of your video. For more flexibility over your video, learn how to make a video with AI and enjoy.
Let’s go through all the 3 available options for adding a voiceover to your product explainer videos, demos, tutorials, social videos, video ads, presentations, and other video projects. Keep in mind that you can create these videos using the text-to-video AI feature—if you don’t want to use templates.
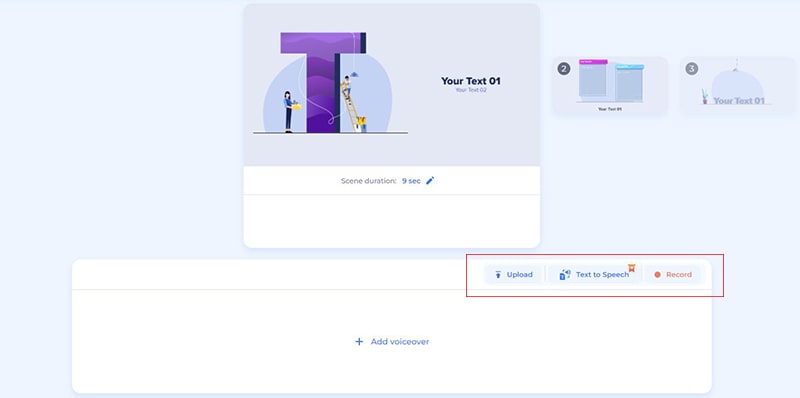
In the “Music” section of our video editor, you can add a music track and a voiceover. Click on “Add Voiceover.”

This will redirect you to our advanced voiceover trimmer where you can add your voiceover and match with the scenes.
There are 3 options to choose from: upload your file, use our new text-to-speech feature, or record it.
Select the scene to which you want to add a voiceover, click on “Upload”, and choose one of the options: your computer, Dropbox, or Google Drive.

If you don’t have a voiceover, select our text-to-speech tool. All you need to do is type in your text, select your language from the 10 languages available in male/female options, and click “Generate”. Adjust the voiceover speed, if necessary. Keep in mind that the text limit is 500 characters.

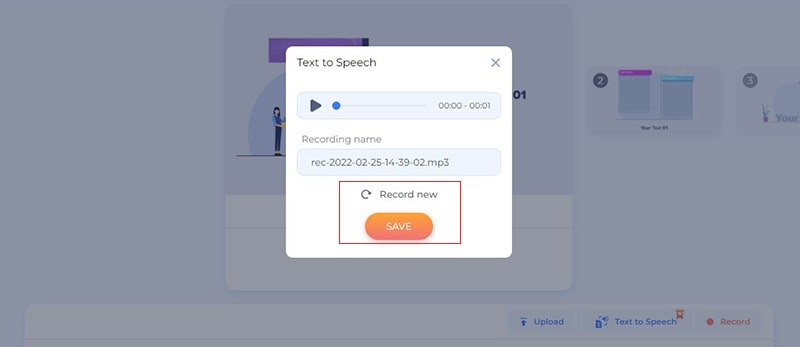
You can listen to the generated voiceover and save it if everything sounds good. Or, you can record again after adjusting the settings for a better result.
Now, you can adjust the scene and the voiceover duration with the help of the trimmer. Click the play button on each scene to preview it, and edit the voiceover section, if necessary.
When you click on “Save”, a new window will appear with the list of all your voiceover files. Select the newly generated track and click the “+” button.

Once your file is added, you can adjust when your voiceover should begin during the scene using the timeline, replace your file if it doesn’t match your scene, or remove it completely.

And, here’s the last option – “Record”. If you want to record your voiceover yourself, select this option, connect your microphone, and click on “Rec”. Here, you can adjust the duration if you plan to record a voiceover for your whole video, not for a single scene.

These were the 3 options of adding a voiceover to your project. It’s easy, fast, and doesn’t require any technical skills.
The text-to-speech feature is available to all our subscribed users. Would you like to try it now?
Share this
Article by: Renderforest Staff
Dive into our Forestblog of exclusive interviews, handy tutorials and interesting articles published every week!
Read all posts by Renderforest Staff